
How to Draw a Waterfall

How many of us have hiked for miles just to see a waterfall? Even if you haven’t, it’s not difficult to recognize the beauty and power that so many find compelling. This is why they are such an interesting feature to include on your fantasy maps. In this tutorial, you will learn some simple steps to walk you through how to draw a waterfall on your map for your next rpg or book. Let’s start mapping!
All of the brushes I will be using for this tutorial are available in The Modern Map Maker Essential Brushes pack for Procreate & Photoshop.

Begin With a Sketch of the Waterfall
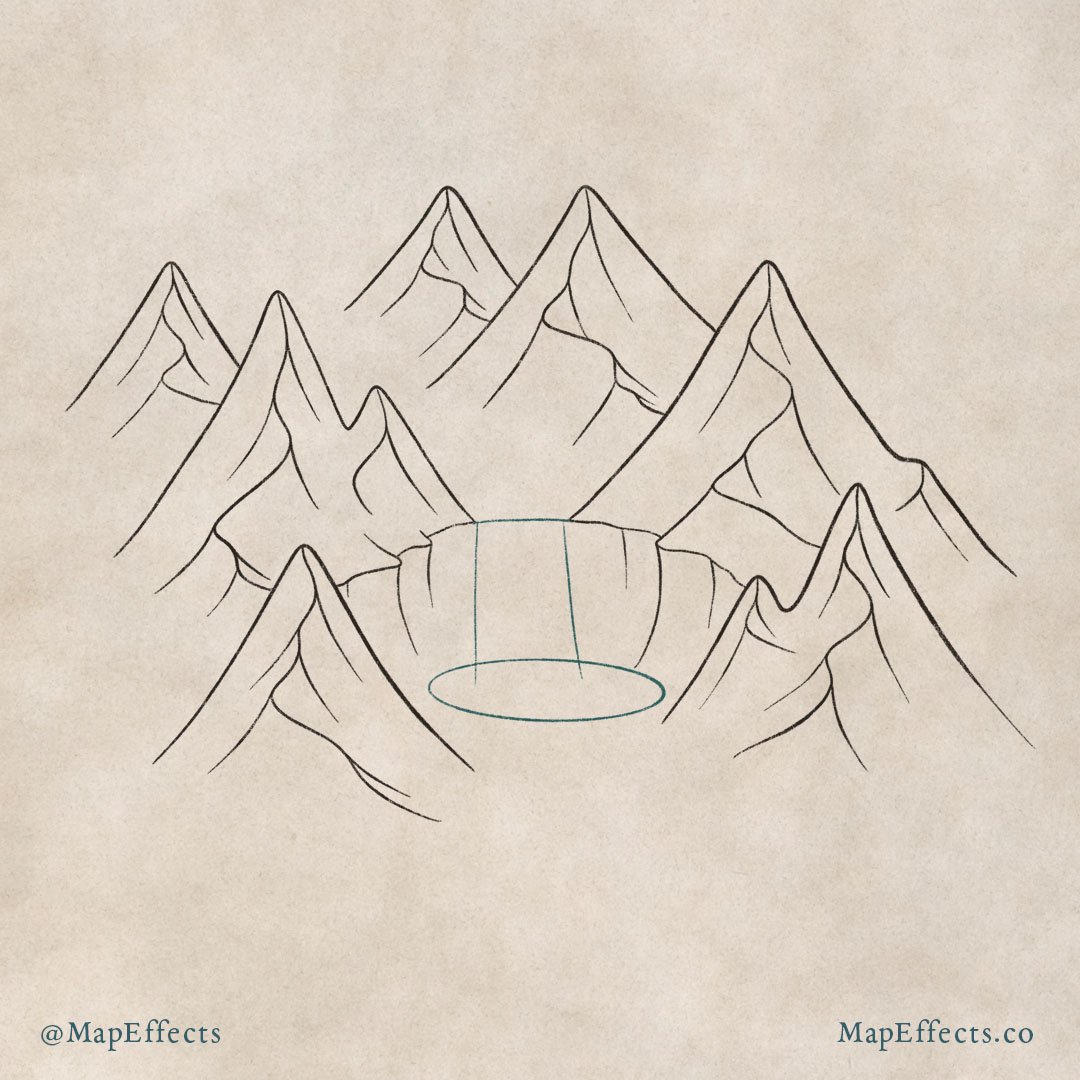
The first thing you will want to do is a sketch and determine how large you want your waterfall to be. You can use a pencil for this step or create a new layer if you’re working digitally.
Draw a curving line where the top of the waterfall will be, then a rectangular shape to show the overall height of the falls. Finally, add a simple oval shape near the base to indicate the pool of water that will form at the bottom.

Sketch the Mountain Shapes
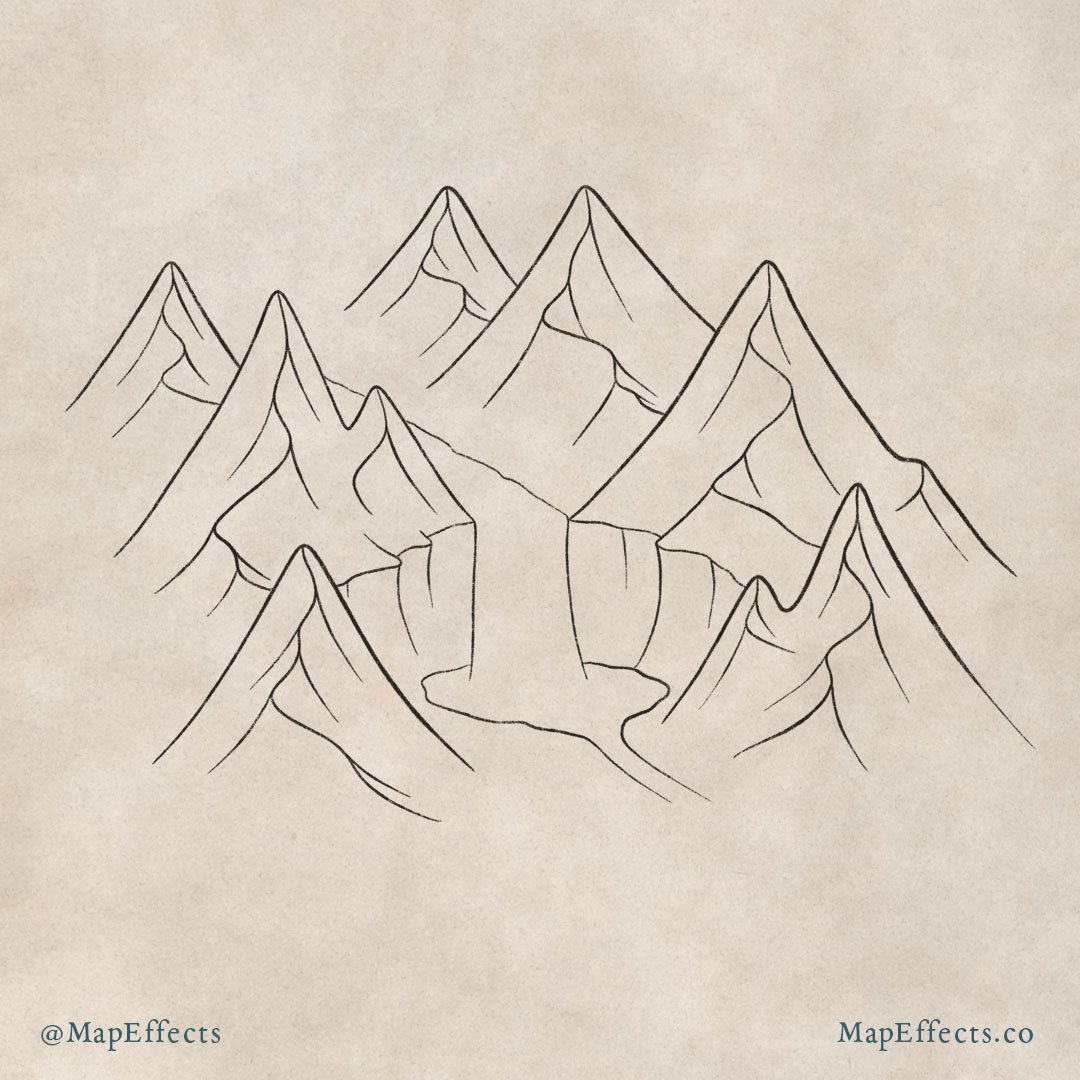
Now that you have an idea of how large your waterfall will be, you can start building up the terrain around it. Sketch some simple triangles around the waterfall to indicate mountains. Remember to keep things pretty loose at this point so you can focus on the overall composition and layout.
In this example, I will have the river weaving between the mountains, which is why I left some space in the middle above the waterfall. I’ve also placed a couple of mountains around the pool at the base to give some depth to the illustration.
Draw the Line Art
After you’ve sketched the general shapes, you can create a new layer and begin drawing the final linework.
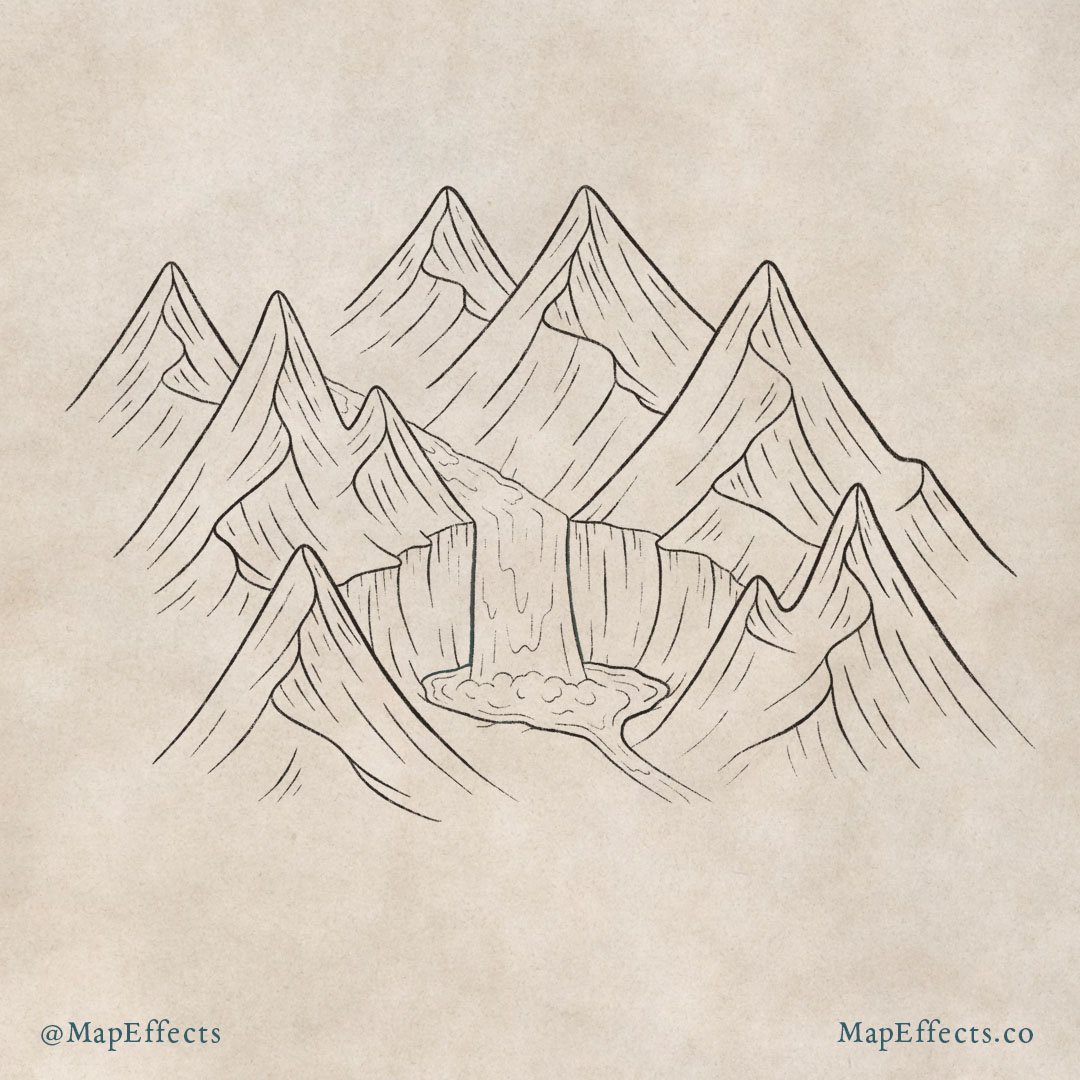
For the mountains, draw some of the ridgelines which connect one mountain to another. Then draw some simple strokes down from the ridge to give shape and dimension to the mountains.
CLICK HERE for a Full Tutorial on How to Draw Mountains on Your Maps
You can also draw the cliff that your waterfall is spilling over. Remember, water will have eroded the surrounding rock, so use a somewhat rounded bowl shape so the water looks like it has been carved into the rock.
Ink the Waterfall Shape
You can now focus on finalizing the shape of your waterfall and river. Since this is in an isometric perspective, I have the river on the top going behind a couple of the mountains so it’s mostly obscured. This is a great way to add depth to the illustration and really sell the perspective.
Working your way down, you can then draw the shape of the waterfall itself. Try to make the waterfall slightly narrower at the top and wider at the bottom. As the water falls it tends to disperse or spread out the further it drops.
Finally, finish drawing the pool and the river flowing out of it. Make sure you roughen up the edges just a little bit so that it doesn’t look too perfect. And make sure the pool keeps more of that oval shape to maintain the perspective.

Draw Details in the Water
The main thing to keep in mind is the detail lines in the water should convey a sense of movement. This doesn’t mean you should just draw straight lines to match the flow of the river. Look at some pictures of flowing water for inspiration and you will see the organic flow of shapes in the water.
At the base of the waterfall, you will want to use more rounded shapes to give the impression the water is bubbling or foaming up. It is a similar technique to the one you would use to draw clouds, so keep that in mind.
More Tutorials You May Enjoy


Add Details on the Mountains
With more detail in the water, you’ll want to add some texture to the mountains so everything feels cohesive. Just add a few more lines following the contour of the sides of the mountains and cliff face. Use a smaller brush with some broken lines so the details doesn’t feel overpowering.

Block in Main Colors
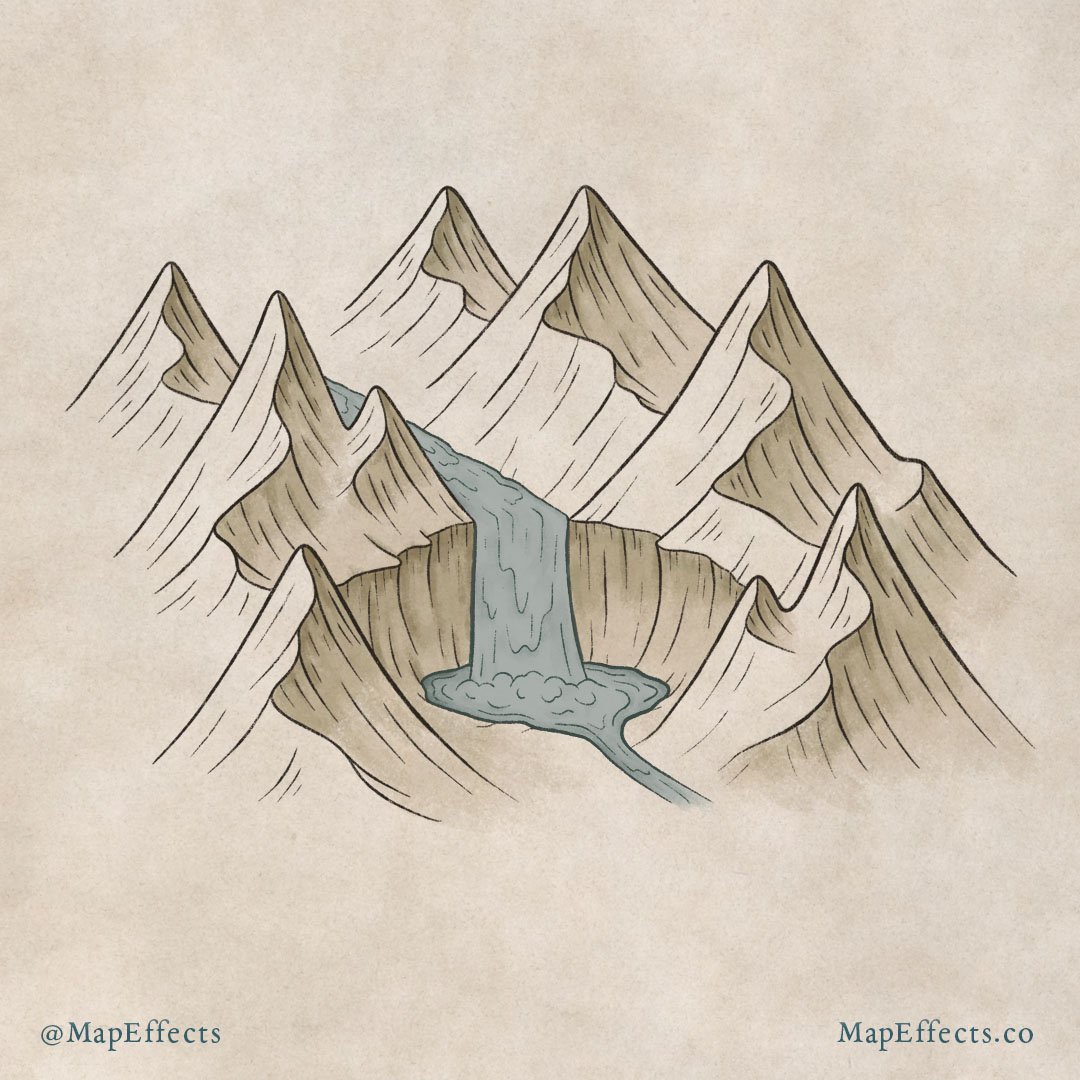
Once all the line work is done you can begin adding color. Create a new layer below your line art and block in some basic colors for the water and the right side of the mountains.
In this example, I’m using more muted colors to fit with the aged paper texture of the background. If you’re working digitally, use the eye dropper tool and select the background. Then darken the color slightly for the mountains and cliffs. Then shift the hue more toward blue or even teal for the water itself.
For the mountains, you will want to determine the direction of your light source. In this case, it is coming from the upper left, so you can take your darker brown color and block in color on the right side of the mountains.
Deepen the Shadows to Add Contrast
As you begin deepening the shadows, use your line work as a guide. On the mountains, you can add more shading near the tops of the ridge line, and down some of the detail lines you added before. Remember, since our light source is coming from the left, you want to have more shadows on the right side of the mountains and the cliffs. Try to image your waterfall in a three-dimensional environment to determine the areas that would be mostly hidden from the light.
You can also begin adding some shadow to the water itself. Again, use your detail lines as a guide and add some shadows along one side of them.

Paint in the Highlights
Go through and add some highlights on the left side of the mountains where the light will be hitting. The lightest part will be near the peaks of the mountains where the light will be most intense.
Then paint some highlights on the water following the detail lines you added earlier. You will also want to add pretty strong highlights where the water spills over the edge, and where it bubbles up in the pool below.
You’re done! Here in Oregon we have beautiful mountains and receive quite a bit of rain, so there are waterfalls all over the place. It makes sense that one of the most popular things to do in this area is to go hiking to see them all. Being able to add them to your maps is a great way to add visual interest and help your fantasy maps to stand out. People are accustomed to seeing mountains and rivers drawn on a map, but it is less common to see a waterfall.
Be sure to check out the Learning Section for More Cartography Tutorials and Tips!
Happy Mapping!
- Josh
