
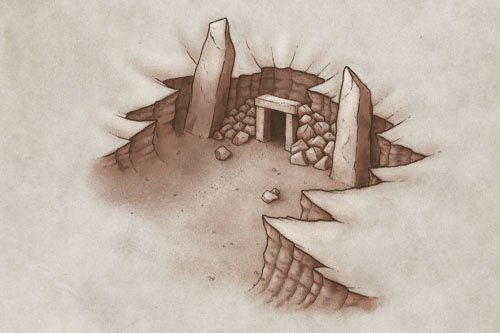
How to Draw Dungeon Walls - Rough Stone

There are so many ways to draw walls for a dungeon map, but if you want something that looks like it’s hand-made from uncut stone then this is the technique for you. This is great if you’re creating a map of a tomb or a cultic site for your next rpg campaign; anywhere you want a setting that feels ancient and lost to time. In this tutorial, I’ll break down the process so you can draw rough stone walls on your next dungeon map. Let’s get mapping!
Watch the Video Tutorial
Tutorial Walkthrough
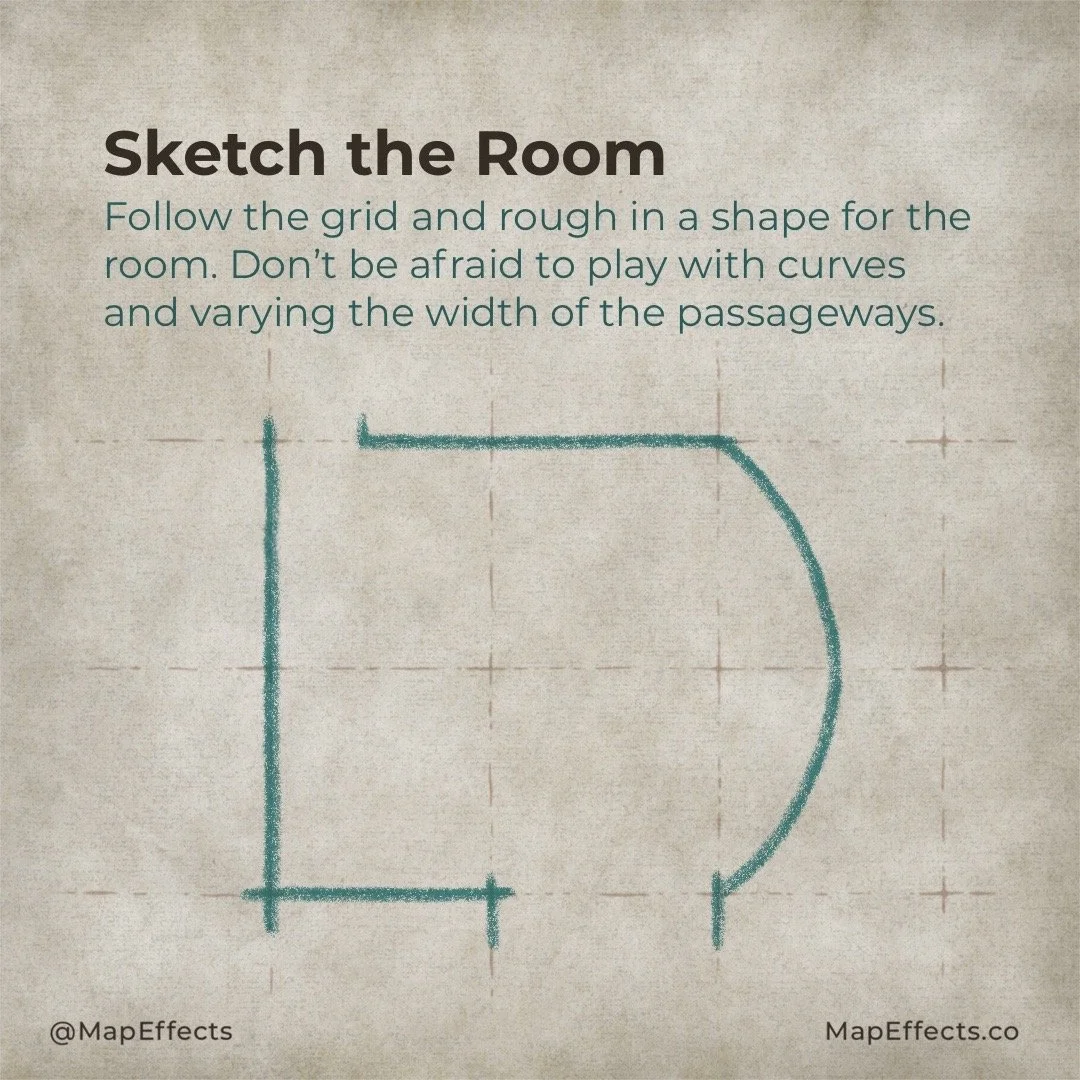
Sketch the Room
The first thing you’ll want to do is figure out the room's shape. Use the grid as a guide and pencil in something, but don’t be afraid to play with curves and vary the width of passageways to create something interesting.
What Scale are the Squares?
Ultimately it is up to you, but the standard for most dungeon maps is that squares are 5’ across. Sometimes you’ll see maps where the scale is 10’, but that would have to be an exceptionally large space.

Sketch the Stones
Now you can pencil in some simple circular shapes along the wall to get an idea of the size of the stones. The main thing you want to focus on is the length of each, and making sure there is a good variety. The human mind is prone to drawing in patterns and you’ll end up making all the stones too similar in size if you skip this step.
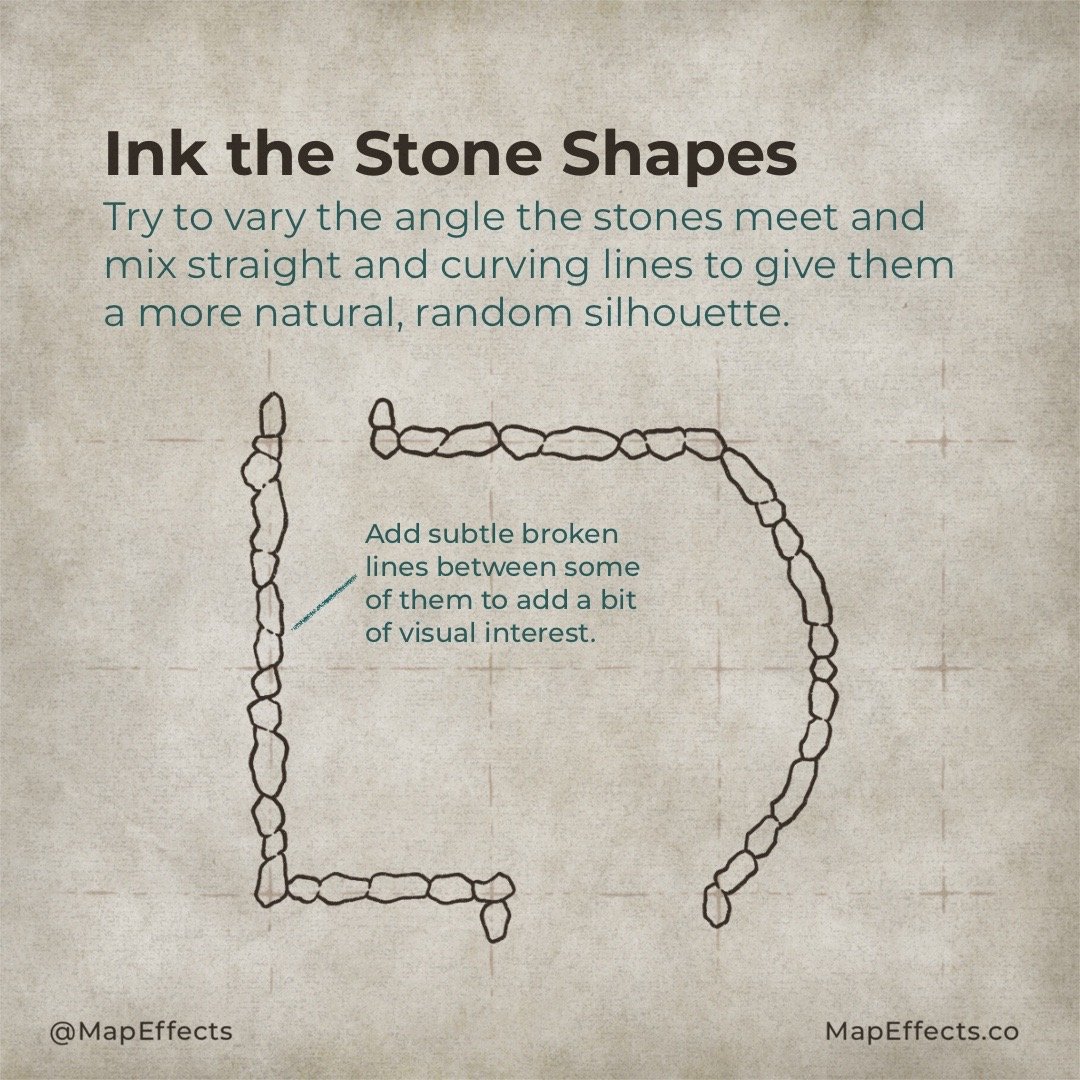
Ink the Stone Shapes
Use your sketch as a guide now to ink the shape of each stone. Try to vary the angle where stones meet, and mix straight and curving lines to give a more natural shape. For this style of wall, we want it to have a bit of randomness to it. You can also add subtle broken lines between some to add visual interest.

Layer Stones Inside
Add more stones on the inner face of the walls to give the impression of height. As if it is built with multiple layers. The number of layers you use is up to you. Using more will make the wall appear taller but may start to push the limits of perspective. Play around with it!
More Mapping Tutorials

Ink in Details on the Walls
Use broken lines and hatching to add a bit of texture and form to the rocks. It’s up to you how detailed you want to get, but generally less is more.
Want to learn more about using the stippling technique on dungeon maps? Check out the tutorial, How to Add Depth to Your Dungeon Maps with Stippling.

Add Ground Details
Now let’s focus on making the dungeon feel like it’s part of a wider environment. Draw a variety of small stones, hatching, and stippling, particularly around the outside of the dungeon. The goal is to make the ground around the walls feel more solid like the dungeon is carved into the earth.

Block in Color
You could stop at the previous step, but let’s take it a step further and add some color. The palette is really up to you and the look you want for your dungeon map, but in general, try to make the area outside the dungeon darker than the outside. You want the focus to be on the dungeon, not the things surrounding the dungeon.
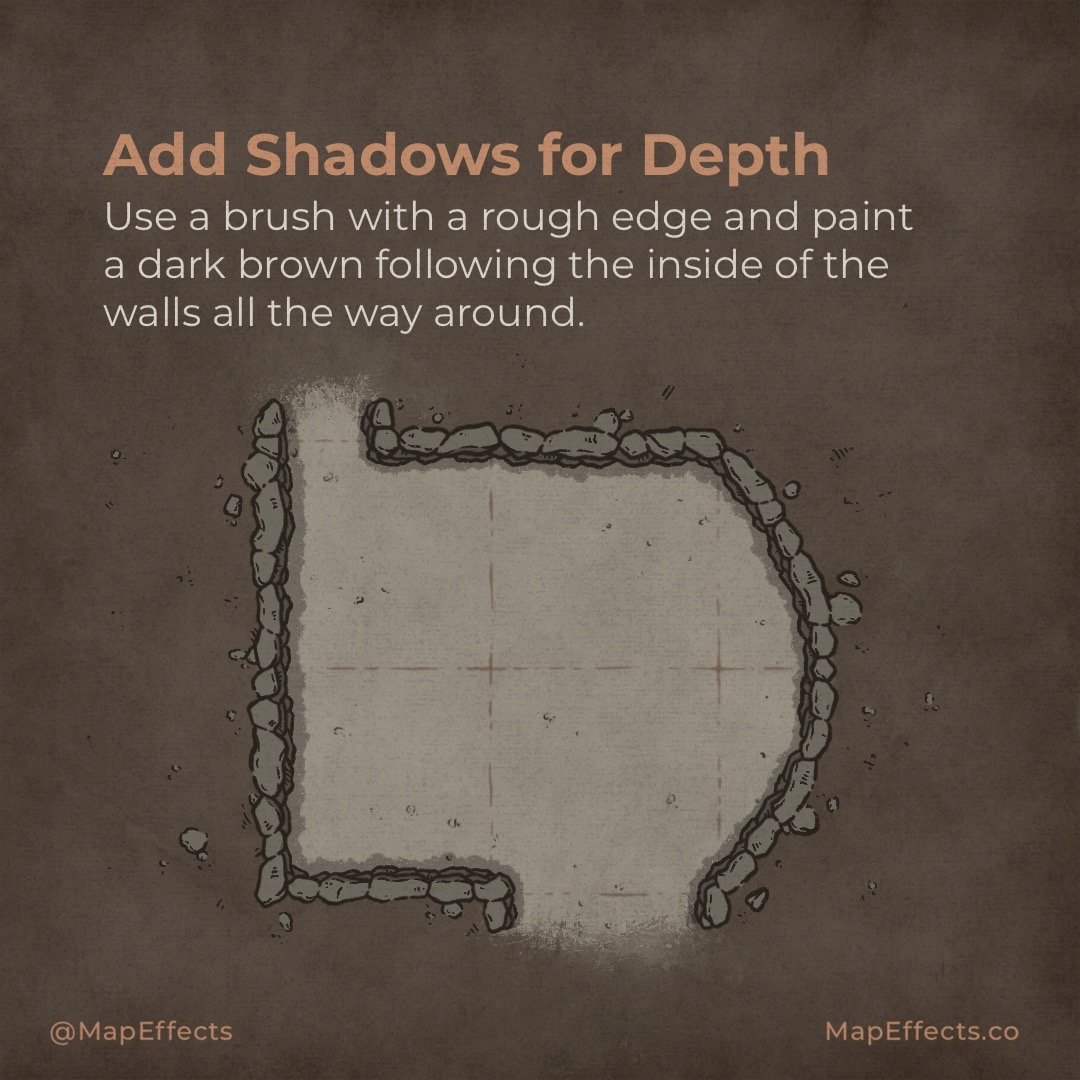
Add Shadows for Depth
Switch to a brush with a rougher edge and paint a dark brown following the inside of the walls all the way around. Since there’s no true light source in this situation, you have to make a creative decision on how to light it. I’ve opted for a top-down light source where objects can simply cast a subtle drop shadow where they overlap. You can get creative with this if you started adding internal light sources to a room like a torch or a candle.

Cartographer’s Liner Brush Field Kit
$29 | For Procreate, Photoshop
The Cartographer’s Liner Brush Field Kit contains all the liner brushes you need to draw your own fantasy maps and bring a traditional, hand-made quality to your digital work!

Add the Highlights
The last thing to add is some highlights to the top row or stones on the wall. I mainly added some to the inside edge though and not where they’re contacting the ground. All the same, any ambient highlights should be pretty subtle because the atmosphere should feel relatively dark.
You’re all done! I hope you found this tutorial helpful for drawing rough stone walls on your dungeon map for your next campaign. This is just the first in a series of tutorials to come on doing dungeon maps. There’s so much more to learn and I’m excited to delve into it with you!
Be sure to check out the Learning Section for More Cartography Tutorials and Tips!
Happy Mapping!
Josh
