
How to Draw Tombs

Drawing a tomb on your map is a great way to add intrigue and a sense of history to your world. They are a compelling feature that gets your imagination going and asking questions, which is exactly the reaction you want from a viewer. In this tutorial, you will learn how to easily draw a tomb on your maps.
All of the brushes I will be using for this tutorial are available in the Map Maker Essential Brushes pack for Procreate & Photoshop.

Sketch the Cliffs
Begin by sketching a simple line to get a rough idea of where you want the top of your cliffs to be. Use sweeping, horizontal strokes to give the impression that the scene is being viewed more from a 45-degree angle rather than looking straight down.
From each point of the cliff draw a line down to where it will contact the ground. Keep things pretty basic at this point and focus on the overall composition of the scene.
CLICK HERE for a more in depth tutorial on drawing cliffs and plateaus

Sketch the Shape of the Stonework
The next thing you'll want to do is sketch the entrance of the tomb, as well as some large standing stones to add a bit of drama and intrigue.
You'll notice I've added some red sketch marks to the illustration to show that the lines are parallel with each other. Keep this in mind as you add the standing stones and try to imagine you are working off a grid to keep everything in the right perspective.
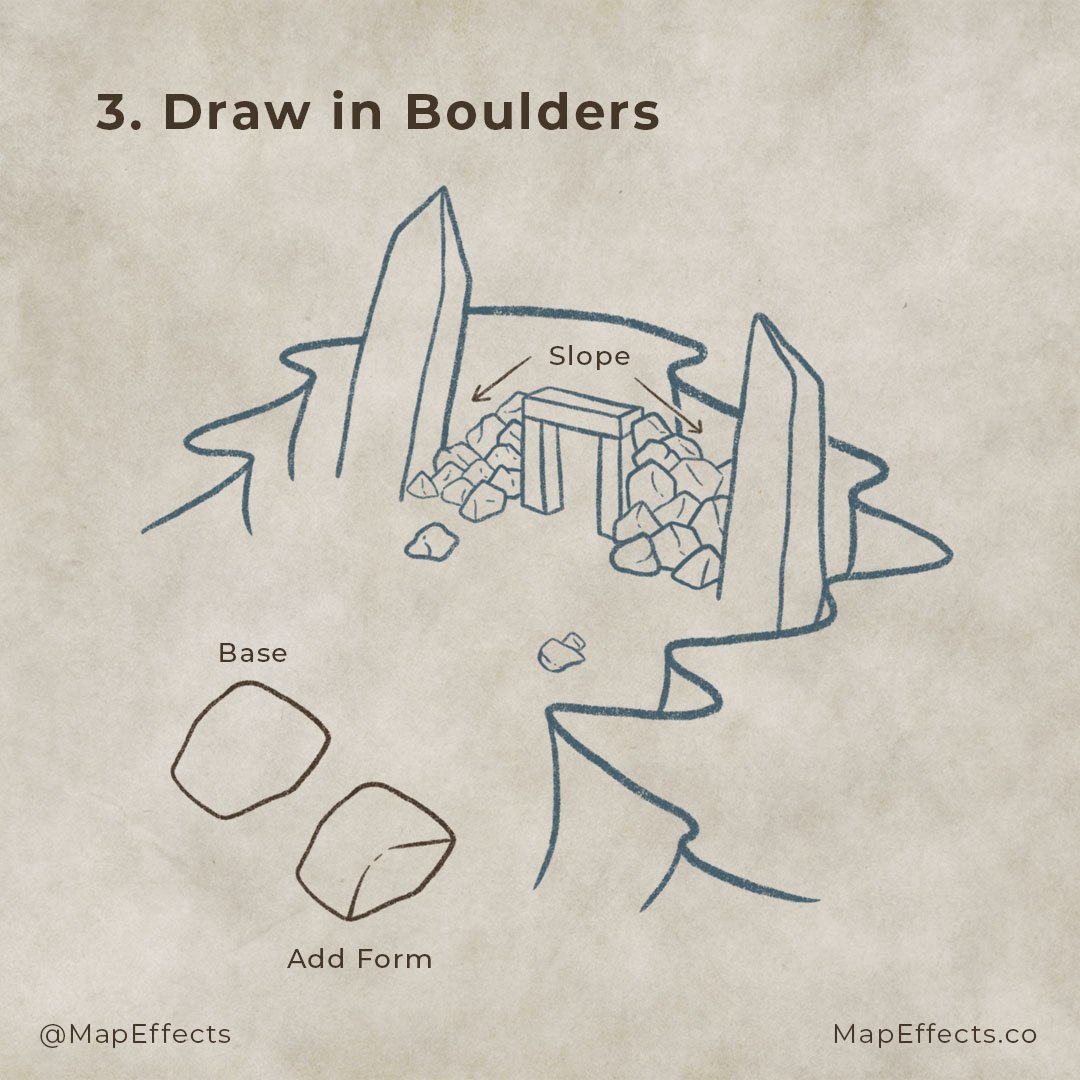
Draw in Boulders Around the Entrance
With your main structures in place, you can begin adding some large stones around the entrance of the tomb. For the basic shape try to keep your perspective in mind and combine curved and straight lines to create some visually appealing shapes. Then use your eye and see where it would make sense to add some broken detail lines to give the boulder form. Boulders are pretty organically shaped so just play around and don’t be afraid to experiment.
As you draw the slopes of the boulders on the sides of the tomb entrance, I would recommend starting at the front and working back. That way your stones are stacked in front of one another convincingly to give depth.
More Tutorials You May Enjoy


Finalize Your Line Work
If you are working digitally, create a new layer above your sketch and begin refining all of your line work to give it more character.
On the cliffs use jagged lines with some points where you will add detail in the next step. For the standing stones and the tomb entrance, it is helpful to vary your line thickness and have some broken lines, particularly where the stone comes to a corner. This helps the whole illustration feel more organic and natural.
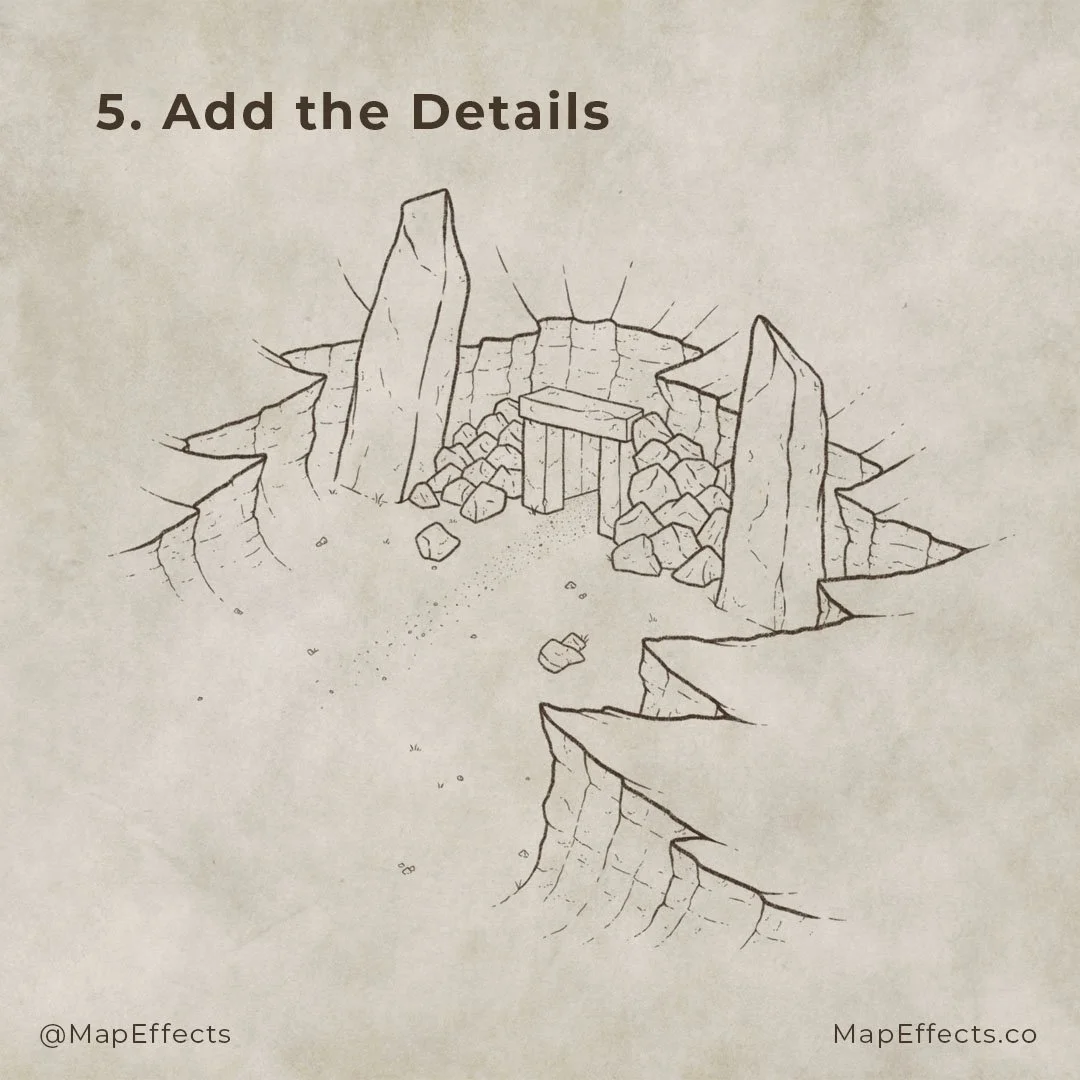
Add the Details
Now that your main illustration is done, you can begin adding some details and texture to your scene.
For the cliffs, add some horizontal marks that follow the shape of the cliff so that it looks like it is made up of several layers of strata. As I mentioned in the previous step, vary the width of your lines and break them up a bit, otherwise, your cliffs may look unnaturally perfect.
There are also some small stones and even a couple tufts of grass scattered in front of the tomb if you look closely. It is subtle but it’s surprising how much little details like this add to the overall composition.

Paint in your Base Colors
For this map, we are going to keep the vintage sepia look to give it a sense of age. Create a new layer below your line work and set the blend mode to “Multiply”. Then take the eyedropper tool and select your background color. You can begin to paint some basic shadows on your scene in the areas that would be most obscured from the light source.
The key to shading is building up your shadows gradually rather than applying the deepest shadows right away. Think broadly about where the light is coming from and where it would hit. But, do not get too caught up in detail at this point.

Deepen the Shadows
Create another layer and lower the brightness of the brown you are using. All we are thinking about at this point are the shadows, and where they would be cast by the surrounding rock.
In this example, the darkest shadows should be on the left cliff face, and of course inside the tomb itself. Use the detail lines as a guide to where to deepen the shadows and give some texture to the rock.
For all of my shading, I am using the Rock Climber Filler brush as it has stone texture built into it. The reason I like using a textured brush is it prevents the shading from looking too smooth and plastic, which can often happen with digital tools.
CLICK HERE to get The Modern Mapmaker Brushes for Procreate & Photoshop
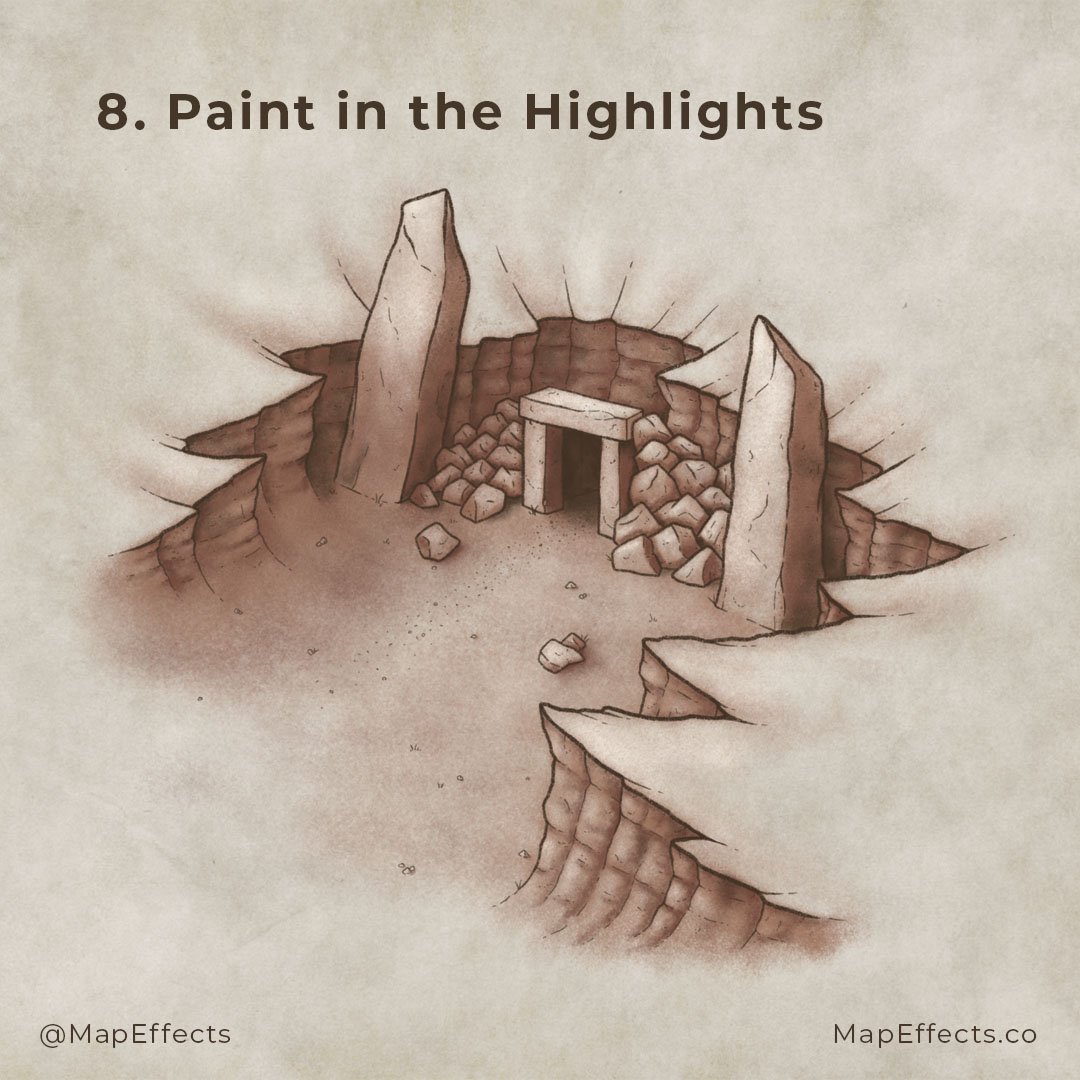
Paint in the Highlights
At this point, everything should be looking pretty close to finished, but a pop of highlights can bring it all together. Remember where your light source is and determine where the light would strike most directly.
Create a new layer and set the blending mode to “Screen”. Use the eyedropper tool and select a lighter color from your background texture. Make sure your highlights are strongest on things like the standing stones, the tops of the cliffs, and the tomb entrance.
Be careful to not go too crazy with the highlights. Sandstone isn’t a very reflective surface and if your highlights are too strong it can quickly look unnatural.
If you found this tutorial helpful be sure to Follow MapEffects on X and tag me with the map you create and I may feature your work. Thank you, and I look forward to seeing your map!
Josh
