How to Draw Ridge-line Mountains
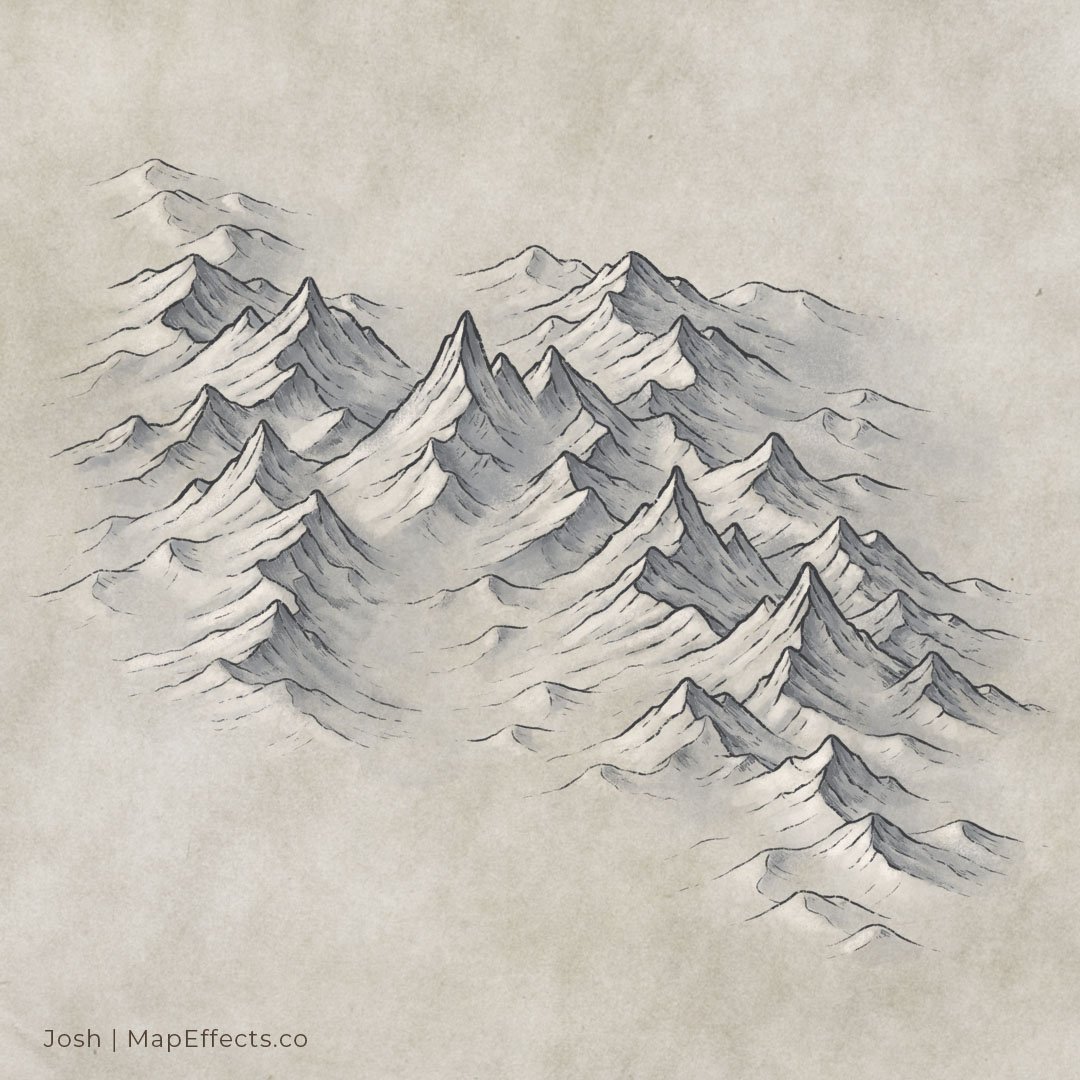
Mountains are an important feature of a map as they impact weather patterns, where rivers flow, and ultimately where cities and nations arise. In this tutorial, you will learn how to draw mountains for your fantasy maps using the ridge-line method. If you love fantasy style mountains but want to push them to have a little more realism, then this technique is for you.
All of the brushes I will be using for this tutorial are available in the Map Maker Essential Brushes pack for Procreate & Photoshop.
Sketch the Ridge-line
Begin by sketching the ridgeline which will be the spine of your mountain range. Make sure the line is fairly jagged and goes up to some clear points as they will end up being the peaks.
Here’s How to Cheat
It has been my experience that the challenging thing about using this method is that it’s difficult to begin with such an abstract shape.
So, one thing you can do is sketch a few of your main mountain shapes, and then connect them using the ridgeline. This gives you a bit of a guide and also lets you have a better idea where some of the mountains will appear in the ridge.
Draw the Main Mountains in the Range
With your ridgeline in place you can now begin drawing some of the mountains. Everywhere there is a point in the ridge is an opportunity to draw a peak in the range. Keep things simple at this point and only draw mountains off those main points.
One of the marks of this style is to use pretty jagged lines with variety in their width. This can be accomplished with a pressure sensitive brush like the Stone Liner Brush I’m using. Or, if you are using traditional tools a brush pen is ideal. But, you can still achieve good results if you only have a ballpoint available to you. This artist is more important than the tools.
More Tutorials You May Enjoy
Draw Smaller Mountains and Foothills
Now that you have the main mountains in the ridgeline, you can begin to add some smaller mountains and hills off of them. The technique is really the same as drawing the main ridgeline.
Be sure to gradually make the mountains smaller as they taper into the surrounding landscape. Though it is possible for a mountain to pop out or a flat landscape, it is much more common for them to be surrounded by smaller foothills.
Draw Lots of Detail!
The final step for drawing the line work is to make one more pass and add in some details. For this method you want the mountains to look pretty gritty and rugged, so generally the more details the better.
Continue drawing smaller ridgelines off the mountains, and adding some broken lines that follow the shape of the mountain. Imagine water running down the rock face and that you’re drawing lines where the water would flow.
Paint in the Primary Shadows
If you are working digitally, create a new layer below your line work to add your main shadows. I am using my Texture Wash Brush here as it builds up similar to water color but also has a random edge. Keep things pretty loose and messy at this point.
Determine where the light is coming from and paint the shadows everywhere you imagine the mountains would be blocking the light source.
The color I selected is mostly gray with the hue shifted just slightly into the blues. This will give some cooler shadows to our mountains.
Deepen the Shadows
I find it best to do my shading in stages rather than trying to finish one mountain at a time. You can now go back through and deepen the shadows in the areas that would be in the most shadow. Primarily near the peaks and where things overlap. But, also be sure to add some subtle shadows along your detail lines on the light side of the mountains.
For this step I find brush variety to be important to give a little more texture to the shading. While my primary brush was the Brush Wash, I also used the Rock Climber Filler, and even the Weathered Liner for some harder detailed shadows. All of these brushes are available in the Shop:
The Modern Map Maker Essential Brush Pack for Procreate & Photoshop
Add The Main Highlights
Though the shadows really give some dimension to the mountains, the highlights are really what make them pop. Create another layer and use the same technique as you did for the shadows, just on the opposite side of the mountains. Just add some basic highlights at this point since we will do one more pass in the next step.
Since the background color of this paper is a warmer tone, I used a warm grey for the highlights. This will give good color contrast as well with warmer hues in the highlights and cooler hues in the shadows.
Paint the Final Highlights
The last step in shading is to add some stronger highlights where the light would hit most directly. Usually, this is near the peaks and the tops of the ridgeline. You can use a pretty hard liner brush for this step to give some harder edges for visual contrast.
Decrease the Saturation
One of the big advantages of using digital tools is that you can make some broader adjustments to your work without having to repaint anything. In this case I decided to lower the saturation level of my mountains just a bit to make them stand out more.
To do this, just create a new layer over everything and set the blend mode to “Saturation” and then select the color black. Use a large soft brush with a low opacity and begin to paint away some of that color until you get something you’re happy with. It’s subtle, but it’s a handy little trick for you to be aware of and keep in your tool belt.
If you found this tutorial helpful be sure to follow MapEffects on Instagram and tag me with the map you create and I may feature your work. Thank you, and I look forward to seeing your map!
Josh


