
How to Draw a Cliff Drop-Off

How do you draw a cliff that is facing away from you on your fantasy map? If you have ever drawn a plateau, canyon, or chasm but wanted it facing away from you, then you know this can be a challenge. In this tutorial I'll share some simple tricks you can use on your maps.
All of the brushes I will be using for this tutorial are available in the Map Maker Essential Brushes pack for Procreate & Photoshop.

Sketch the Shape of the Barrow
Begin by sketching a simple hill shape for the barrow and add an arc below where the ground will be. The barrow will be in a side-view perspective as if you are looking at it from ground level. These lines will only serve as a guide, so make sure you create them on their layer if you’re working digitally or use a pencil.
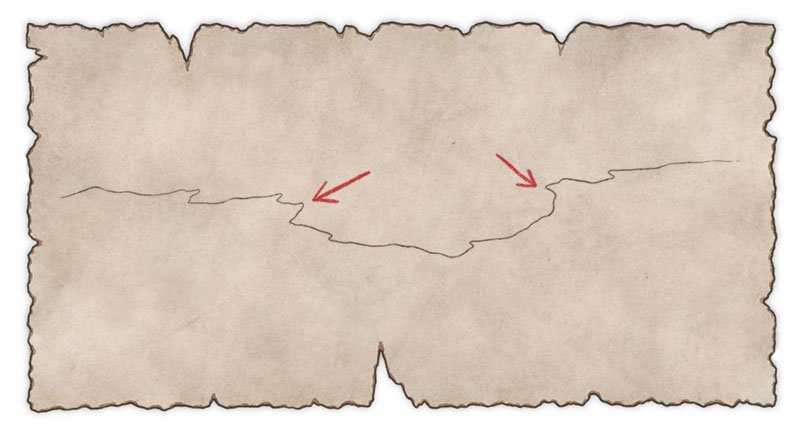
Draw in Points on the Cliff
On a new layer above your sketch begin drawing the final line work for the edge of the cliff. The key to this tutorial is to make sure there are a few points that jut out in order to show some of the cliff face. This is what will allow you to convey some depth in the landscape.
Important to Note
Since this is in isometric perspective, make sure that your stroke is moving horizontally in a sweeping motion to sell the perspective. If the points of the cliff are drawn too vertically then it won’t look right since it will appear that you’re viewing the cliff from directly above.

Sketch Vertical Lines for the Cliff Face
Something else important to note is that the cliff faces you will see coming off these points should be drawn straight up and down. There is a tendency to want to slope them out in order to make them more visible. But, if you do this it will really mess up the perspective and something will look off. So, resist the temptation. You are showing just enough to indicate a sudden drop in the terrain, not showing the whole cliff.
More Tutorials You May Enjoy


Draw Sediment Layers on Cliff
Now that you know how much of the cliff face will be shown, you can add some subtle detail to make it more interesting. You can include some breaks and horizontal lines to make the cliff look like it has layer of sediment.
If you want a more in-depth tutorial on adding detail to the cliff face, be sure to check out my tutorial on How to Draw a Plateau On Your Maps

Paint in Simple Colors
With all of your line work done, you can now begin adding some color to your cliff. If you are working digitally, you can create a new layer below your line work and set the blend mode to Multiply. Select the background color of the paper texture and paint some color on the cliff points and subtly along your detail lines on the top of the cliff.

Paint in Your Shadows
To create more depth, darken the same color you were using and paint some deeper shadows on your cliffs. Particularly near the tops where there tends to be an overhang and the light is more obscured. This will help to give the cliffs a little more depth and visual interest.

Add a Pop of Highlights
The last step is to paint in some highlights on the top of the cliff where the light would be striking more directly. This will go a long way in giving an illusion of depth to the landscape and that it drops off. To add the highlights create another new layer, select your background color again and set the blend mode to Screen.
You can also add some subtle shadow to the “valley” below the cliff just to add some more contrast and emphasize the height difference in the terrain.
For the shading in this tutorial I am using the Rock Climber Filler brush, available in The Modern Mapmaker Essential Brush pack for Procreate and Photoshop. This brush has some stone texture built into it to help give that gritty texture to the shading.
This technique is useful any time you want to show a sudden drop-off in the terrain and leave a little bit to mystery. It can be subtle, but it is the little things that can really take your maps to the next level.
If you found this tutorial helpful be sure to follow MapEffects on Instagram and tag me with the map you create and I may feature your work. Thank you, and I look forward to seeing your map!
Josh
