
How to Draw Classic Fantasy Mountains

Want to learn how to draw a more classic style of mountains on your fantasy maps while still feeling unique? I developed this method for drawing mountains while pulling inspiration from the timeless map of Middle Earth from The Lord of the Rings, as well as some of the amazing cartographers from the 18th century. This method of drawing mountains is a great way to give a more classical pen and ink feel to your maps!
The Stone Liner ink brush I will be using for this tutorial is available in The Modern Map Maker Essential Brush Pack.
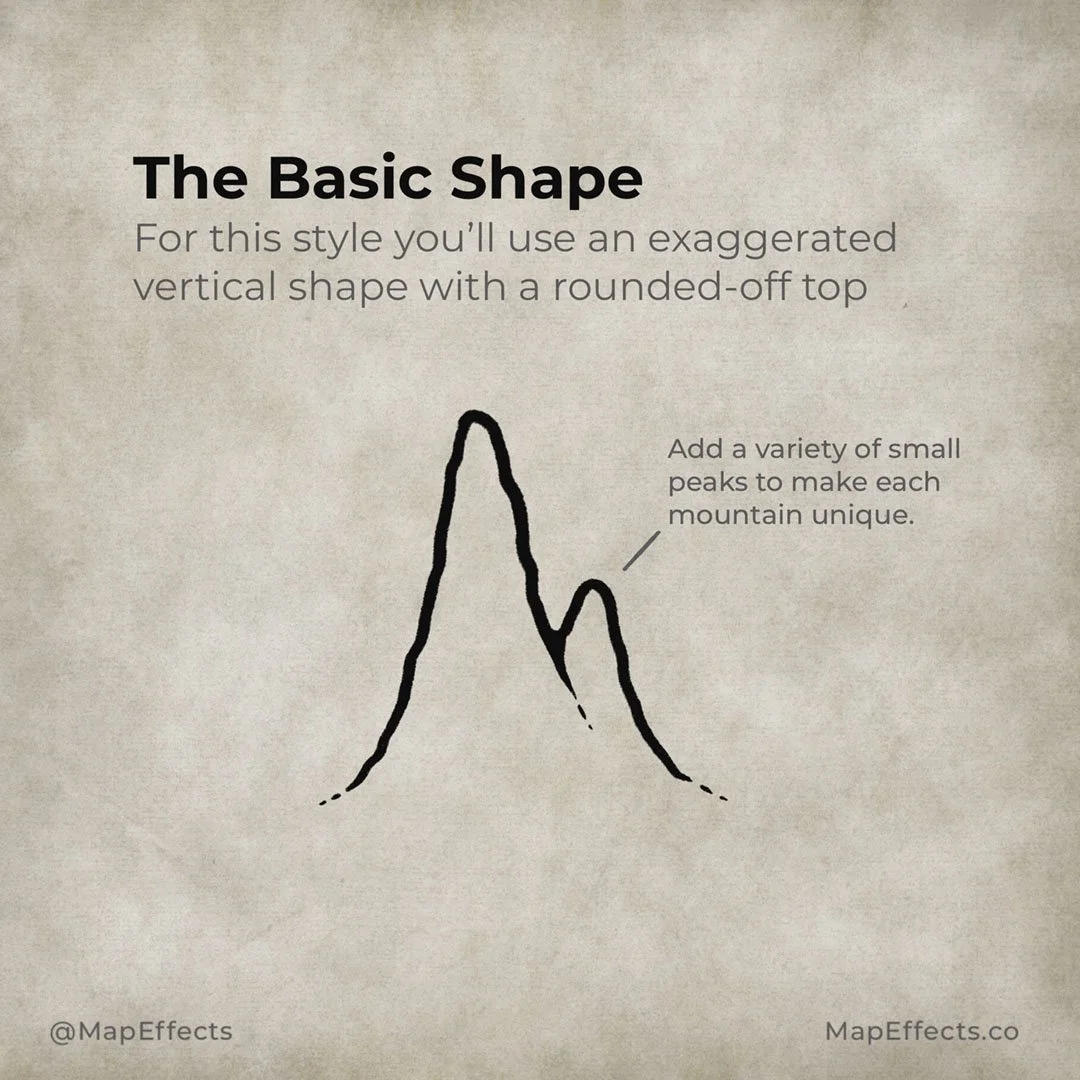
Understanding the Basic Shape
For this style of mountain, you’ll use an exaggerated vertical shape to give a more fantastical impression of the height of the mountains. But, rather than them coming to a point at the top we are going to round it off slightly. You can then add a variety of smaller peaks along the sides to make each one unique.

The Primary Mountains
Begin by drawing several of these mountain shapes in a row to create the main range. Be sure to make the mountains overlap in a variety of ways to give a sense of depth.
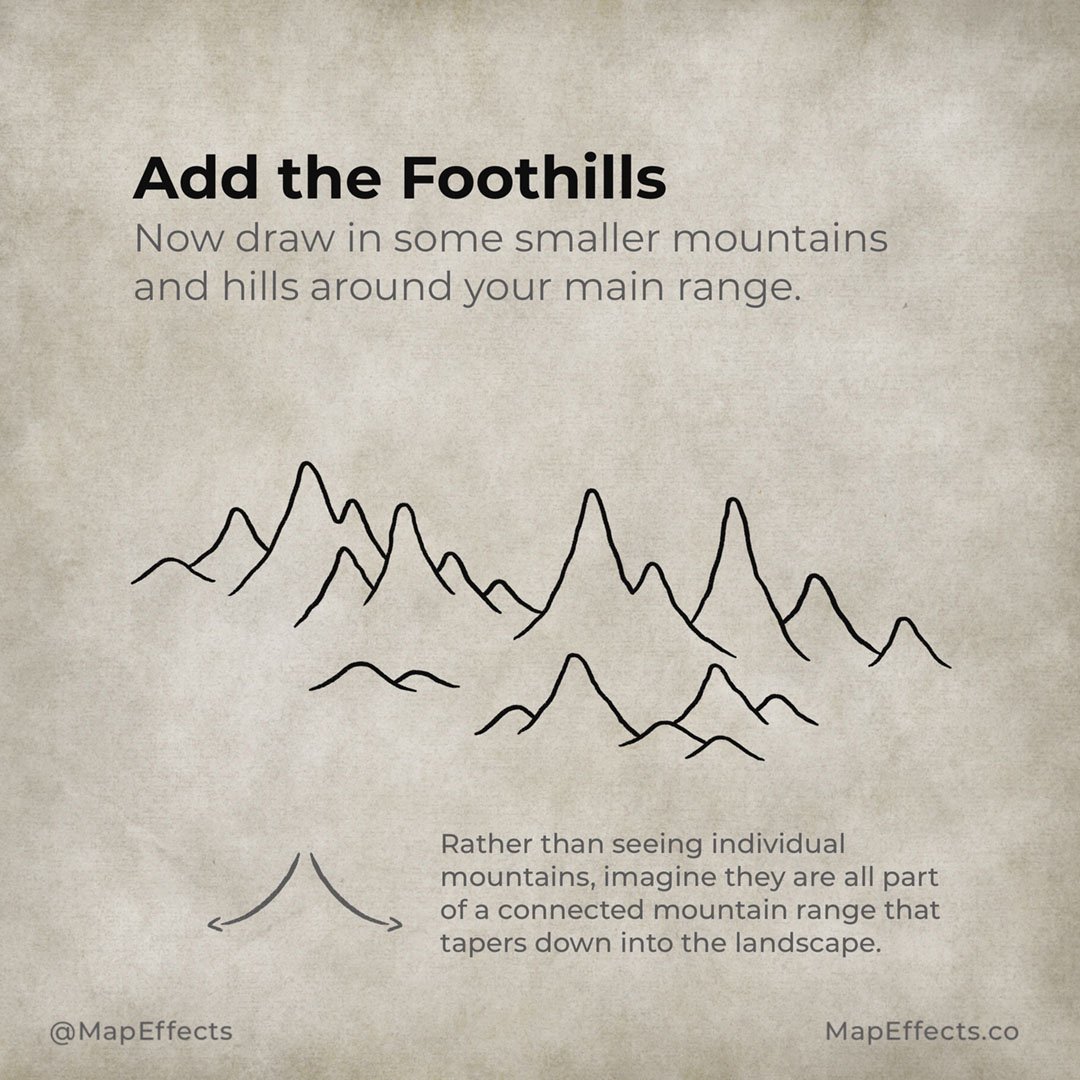
Add the Foothills
With the main mountains in place, you can now go back and draw in some smaller mountains and hills around the main range.
Rather than seeing individual mountains, it can be helpful to imagine they are all part of a connected range that tapers down into the landscape. This means that in general the tallest mountains should be in the middle and gradually get smaller and smaller.

Draw the Ridgelines
Use some broken lines that sweep down the front of the mountains to give a pyramid-like shape. You’ll want to make the ridgelines feel like they are connecting to the mountain or hill in front of them whenever possible.

Ink in the Main Hatching
Determine your light source and add hatching lines down the opposite side of each mountain. Just use your ridge as a guide and follow it down to the surrounding landscape.
In this example, the hatching lines should roughly follow the contour of the mountain’s shape.
More Tutorials You May Enjoy


Darken the Shadows
Now go back through and widen your hatching lines near the tops of the mountains and along the ridgelines. This will cause the peaks to appear like they are in deeper shadow and create some contrast.
You can also add some subtle hatching to the opposite side of the mountains to give some more texture.

Finish Adding Detailing
Now add some trees and tufts of grass to really bring your mountain range to life. With this classic mountain style, you can use some pretty basic shapes for different features in the terrain.
Be sure to check out the Learning section for more map-making tutorials and tips!
Watch The Video Tutorial
Be sure to check out the video tutorial below for how to draw this and the more classic style “Tolkien” mountains like you would find on the map for The Lord of the Rings!
How to Draw Classic Mountains on Your Fantasy Maps - Lord of the Rings Style
