
How to Draw a Cave Entrance

If you want to create interesting maps for your RPG adventure, including points of interest to encourage exploration is key. Discovering a cave entrance in the face of a cliff lends to a number of storytelling possibilities and encounters. But, how exactly do you draw something like that, especially if you’re using a top-down perspective? It’s certainly a challenge, but I want to walk you through the process and share some tricks so you can draw a cave like this on your next map. Let’s start mapping!
All of the brushes I will be using for this tutorial are available in The Free Apprentice Brush Pack
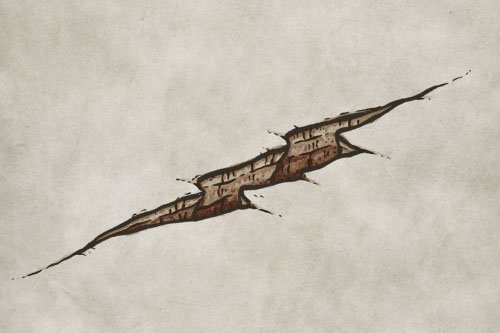
Sketch the Cliff Face

Grab a pencil and rough in the face of the cliff you want to add to your map. Avoid making the line too straight and rigid and imagine combining “S” and “C” curve shapes to make it more interesting. To draw the cave, you’ll also want to make sure that you inset into the cliff where you intend for the entrance to be. This is key to selling it in this perspective.
Build Layers of Terrain

When sketching, it’s important to work from simple shapes and slowly build up complexity. In the previous step, all we were focusing on was the overall shape of the cliff. Now, we’re thinking about how to build up layers to make the cliff feel like it has some natural shapes. Don’t worry about making your sketch perfect and tidy either, this will free you to work loosely and experiment. You can see in the sample above how you and build up layers, and use broken lines to make things feel more organic.
Add Scattered Stones

Now you can come through and draw in more detail to make everything feel rocky. Experiment with a variety of stone sizes and groupings scattered around the cliffs. The main thing to avoid is making all the stones in a particular group roughly the same size as it will appear unnatural.
Ink the Line Art

If you are working digitally, you can create a new layer above your sketch to begin inking the final line art. When drawing something like a cliff, you want to make sure your lines aren’t to smooth or even. You want to convey a rocky texture so using broken lines and varying the width of the lines will go a long way.
More Mapping Tutorials

Draw Detail & Texture

With all the main pieces in place, you can add some detailing to give everything a bit more texture. Use broken lines on the boulders to give them form, similar to what you did on the cliffs. Then, add tufts of grass scattered throughout with the strokes following the shape of the terrain. For the mouth of the cave I like to use stippling (Individual dots) to darken the entrance, in opposed to only using shading in a later step. Just make sure the density of the stippling gradually decreases the further you get from the mouth of the cave.
Paint Stone Color

You absolutely could stop with the previous step if you want more of a vintage look for your map, but what if you want to add some color and shading? If you are working digitally, create a new layer below your line art and select a gray color. What I generally like to do is use the eyedropper tool to select the background color, and then reduce the saturation to something I like. So in this case the rocks aren’t pure gray, but a very desaturated warm-gray.
You can then fill in the rocks with your color, but also include some layers of it on the cliffs as well. This will just give the impression that areas of the rock are exposed between the rest of the terrain.
Add Main Shadows

The first step to adding any type of shading is to determine the direction the light is coming from. For this example, we’ll place it in the upper left corner, which means all of our shadows will be cast in the opposite direction.
Create a new layer and set the blend mode to “Multiply” and select a medium gray. You’ll then also want to use a low opacity brush that’s pressure sensitive to gradually build up layers of shadow in a similar way to if you were using watercolors. The trick here is to not get sucked into the details at this point, but focus on looking at the cliff as a whole and imagining where the main shadows would be cast.
You can get the shading brush I’m using for Free HERE in the Apprentice Brush Pack.
Darken the Details

Now, go back with the same color on the same layer and darken the areas that would be most hidden from the light source. Look for areas where objects overlap like the stones and edges of the cliffs. You can also paint some subtle shadows on the ground to help it feel like it has depth and isn’t perfectly flat.
Paint in Highlights

The final step is to paint in some highlights to help everything pop a little more. Just try not to go too crazy, because you don’t want the rocks to appear reflective. Create one more layer below your line art, and above your shadow layers, and set the blend mode to “Add” or “Screen”. You can use the same brush as the previous step, but you can switch to a lighter, warm color like I have here (#F2E6E0). Then you can do the opposite of what you did in the previous steps, beginning with some broad highlights first on the left side of the cliffs, and then some more detail highlights.
With that, you are all set to draw a cave on your next fantasy map. I hope you found this helpful, and I look forward to seeing your maps!
Josh
