How to Draw a Canyon
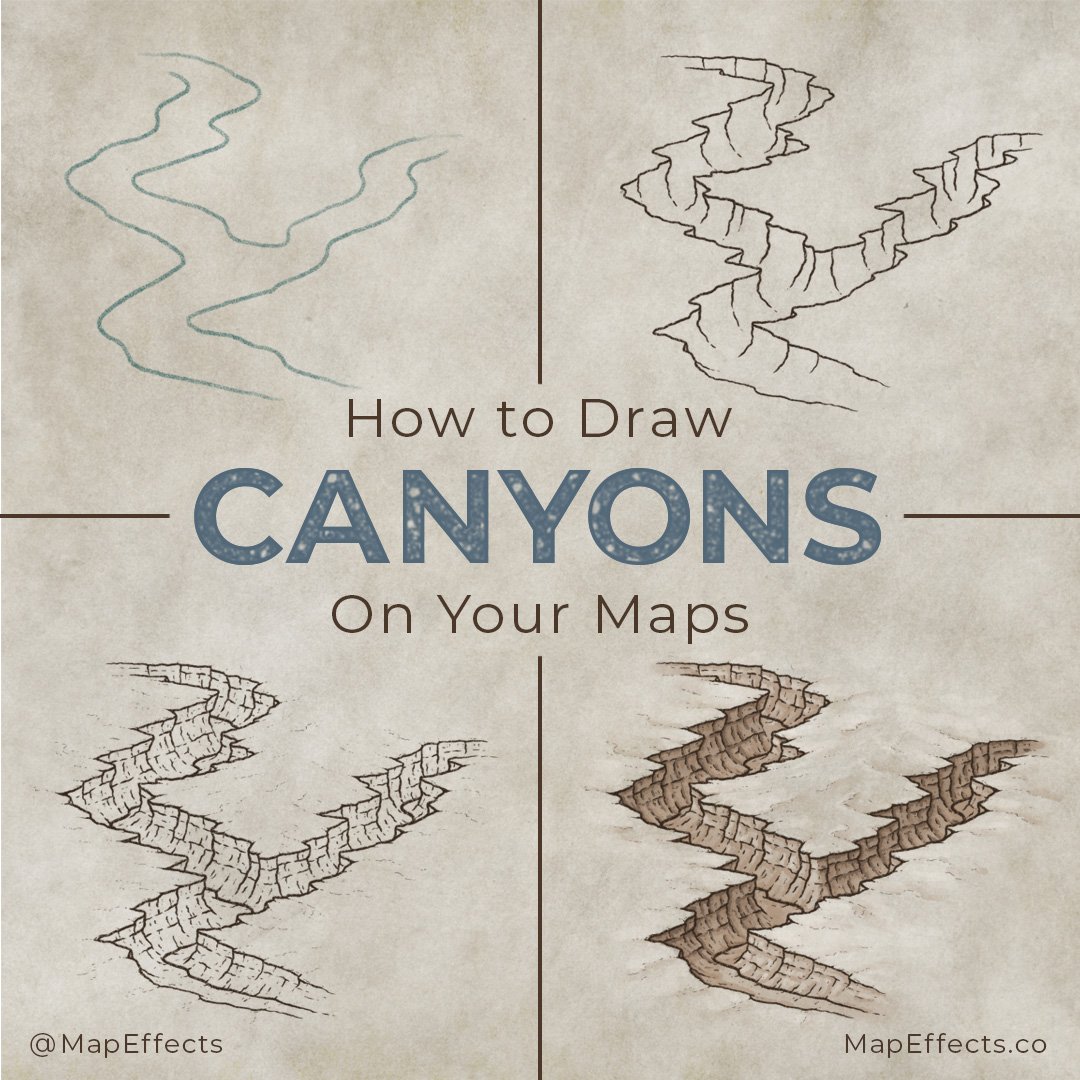
Canyons are a striking feature of any landscape and can really be a focal point in the story you're telling. In this tutorial, you will learn how to draw canyons that bring a sense of depth to the landscape and make your fantasy map really stand out.
All the brushes used in this tutorial are available in The Cartographer’s Liner Brush Field Kit for Procreate.
Sketch the Cliff Tops
Begin by roughly sketching where you want the canyon to be on your map. Canyons typically form from water erosion, so think about the cliff tops “flowing” side by side like they would for a river.
If you’ve seen my Original Canyon Tutorial, you may notice that I started with the cliffs this time rather than the river. Both methods work, so just use whatever feels more natural to you.
Draw the Cliffs
Now that you know where you want your canyon; create a new layer (if you’re working digitally) or switch to your pen to ink in the edges of the cliffs.
Use more horizontal strokes to help convey the perspective, and let them be a bit jagged to give a rocky texture.
I am using the Cliff Hanger brush (Seemed appropriate haha) to ink all the line work for the canyon. It has a bit of a gritty texture which helps give more character to your line work.
Add the Cliff Faces
At every point where the top of the cliff juts out, draw a jagged vertical line down to the bottom of the canyon. You will notice that these lines are not straight up and down but have a bit of a C-curve to them.
More Tutorials You May Enjoy
Create Sediment Layers
In canyons you will often see layers of sediment that were deposited rapidly to form thick layers like a cake. To achieve this effect, use broken lines that roughly follow the edge of the cliff all the way around.
Add Texture & Details
It’s time to start making this canyon look really rocky and textured by using the details you’ve already drawn and building upon them. Imagine you’re drawing lines that flow down the face of the cliff. Try to avoid too much repetition, so mix it up with broken, long, and even dotted lines.
You can also add some subtle lines on the ground above the cliffs to bring it all together. At every inside corner on the top of the cliff, add a line that tapers into the landscape. This will give the appearance of the cliffs overlapping.
Last but not least you can add your river as the base of the canyon. Be mindful of where the cliff face obscures the river. Having it “weave” between the cliffs is a great way to add a lot of depth and dimension.
Block in Main Color
If you are working digitally, use the eye dropper tool and pick your background color and darken it slightly. Then, create a new layer below your line work and paint your color on the inside of the canyon.
Paint in the Shadows
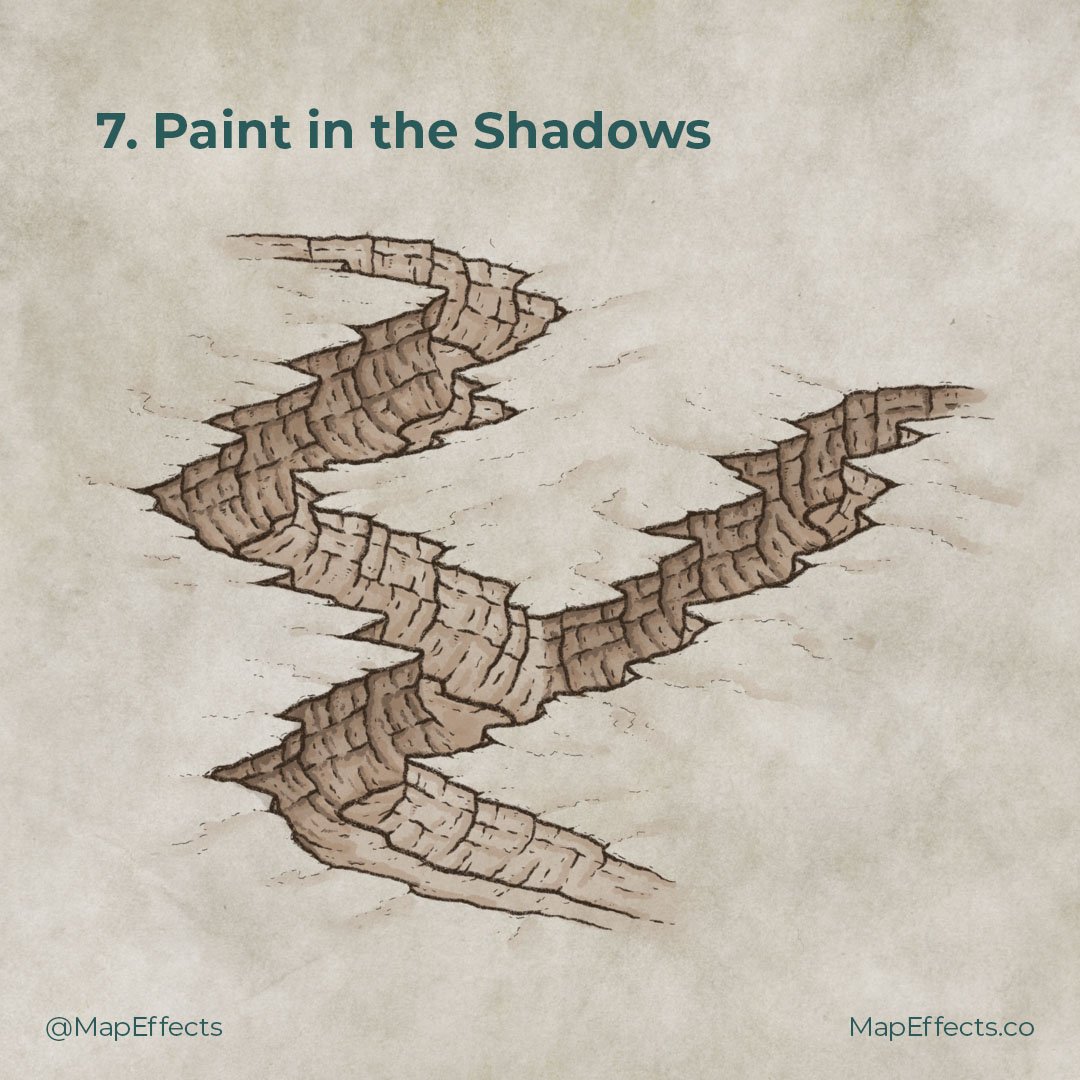
To begin shading you will need to determine the direction of your light source. In this case, the light will be coming from the upper left, which means the cliffs on the left side of the canyon should appear darker and more in shadow.
Use your line work as a guide to place your shadows. Everywhere something overlaps you can add a bit of shading “behind”. Just try to picture which parts of the cliff would be more hidden from the light source, and make those areas the darkest.
For the shading I am using the Heavy Marker from the Liner Brush Field Kit. It has some texture built into it and you can vary how dark it is with how hard you press the stylus, which makes it great for shading.
Add a Pop of Highlights
The last step is to add some subtle highlights to the areas of the canyon that would be most directly in the light. Select your background color again and increase the brightness and lower the saturation slightly.
Remember, your light source is in the upper left, so add some highlights to the cliffs on the right side of the canyon, particularly near the top. You can also add some subtle highlights on the surrounding landscape.
If you found this tutorial helpful be sure to follow MapEffects on Instagram and tag me with the map you create and I may feature your work. Thank you, and I look forward to seeing your map!
Josh


