
How to Draw Mountains in Top-Down Perspective

One of the most important features on fantasy maps are the mountains. Not only are they prime real estate for dwarves and dragons, but they play an important role by impacting political borders, travel, and even weather patterns.
But, they can be challenging to draw in a top down perspective and still get a good sense of scale and depth. While it is much easier to accomplish this in an Isometric Perspective, there are ways to really make your mountains pop off the page. So let’s start mapping!
All the brushes used in this tutorial are available in The Cartographer’s Liner Brush Field Kit for Procreate.

Sketch the Ridgeline
Begin with a couple of simple curving lines just to get an idea of where the main ridge will be. You can do this in pencil, or if you’re working digitally like me then just keep this on its own layer.
Use flowing lines with a “C” or “S” curve but don’t be afraid to join them together.

Draw the Main Ridge-line
Create a new layer and begin inking in the main ridgeline of the mountains. It’s important to note you are drawing a series of connected mountains which form a range, not individual peaks.
Make sure your line is rather jagged and you are varying the width of the line as you go.
I am using the Rough Tooth Brush in The Cartographer’s Liner Brush Field Kit to ink all the line work for the mountain in this tutorial. It has a bit of grit to bring in a bit of rocky texture.


Add the Secondary Ridges
Look for the points along the main ridgeline and draw the secondary ridges that come off. Keep using very jagged lines but have them generally flowing away from the main ridge.
Use broken lines as the ridge flattens out and joins the surrounding terrain. This will help it taper into the landscape.
More Tutorials You May Enjoy


Add a River
At this point you can add a river flowing between the two main mountain ranges. Make the river wider as it goes since it will be accumulating water from feeder streams on its journey to the coast.

Draw Additional Streams
If you look at a terrain or topographic map of our own world, you’ll notice just how many small streams there are in mountain ranges. Even if many of them are just seasonal.
Anywhere there is a low point where two ridges come together, there is potential for a stream. You do not need to show every one, just the largest or most important to your map or story.

Finish Detailing the Mountains
Keep adding little details to the mountains so they look nice and rocky. Try to imagine you’re drawing lines that follow the way water would flow down the sides of the mountains if you poured water over them.
But, don’t bring the mountain ridges all the way down to the river. You’ll see why in the next step!

Detail the Surrounding Terrain
You may have noticed that it can be a little challenging to tell the difference between a line that’s a stream and one that’s just a detail on a mountain.
A way to overcome this is to help the river stand out more by drawing contour lines that follow the river as if it’s cutting through the mountains.
You can then add thin, broken lines around the outside of the mountain range to give a sense of contour that indicates foot hills.
Now, it’s time to start adding some shading!

Paint Basic Shadows
It’s time to really start making these mountains pop with some basic shadows. Create a new layer below your line art and pick a color slightly darker than your background.
Use a relatively soft brush and paint in some shadows on the side of the mountains facing away from the light source. Be mindful of your light direction but it doesn’t have to be perfect since you’re adding surface texture.
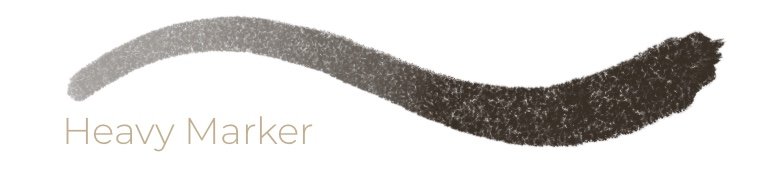
I am using the Heavy Marker Brush to block in the shadows and then switching to the smudge tool to blend the edges a little more.

Deepen the Shadows
Now you can come back through with a little bit darker shade of brown and paint in some deeper shadows to add more depth.
Generally, the darkest shadows should be near the peaks along the ridgelines. These areas should stand out with the most amount of contrast.

Paint in Highlights
Create a new layer and pick a color that is lighter than your background. I personally don’t like using pure white but have opted very a very light and desaturated tan color.
Like the shadows, the strongest highlights will also be near the peaks along the ridgeline. You can also add a pop of highlights to the surrounding foothills to help them stand out…but keep it subtle!

Do Some Finishing Touches
You’re almost done but there are a couple of little things you can do to really pull everything together.
Create a new layer and set the blend mode to “Saturation” and select the color black for your brush. With a soft brush that you can control the opacity with how hard you press, lightly paint over the highest mountains and blend it into the surrounding terrain.
If you need a little extra contrast then create another new layer and set the blend mode to “Overlay”. With the same brush as the previous step you can paint over the areas that would be the most in shadow just to add a little more pop of contrast.
If you found this tutorial helpful be sure to follow MapEffects on Instagram and tag me with the map you create and I may feature your work. Thank you, and I look forward to seeing your map!
Josh

Cartographer’s Liner Brush Field Kit
$29 | For Procreate & Photoshop
Want the the brushes I am using for this tutorial? The Cartographer’s Liner Brush Field Kit contains all the liner brushes you need to give an traditional quality to your digital work!
