Drawing Cliffs on Coastlines in Top Down Perspective

One of the biggest challenges with fantasy maps in a top down perspective is they tend to look a bit flat. Fortunately, there are some simple tricks you can use to build up the layers of the landscape to give a sense of depth. In this Map Tip we’ll be looking at how to draw cliffs on a coastline in this perspective and make them really stand out in your map.
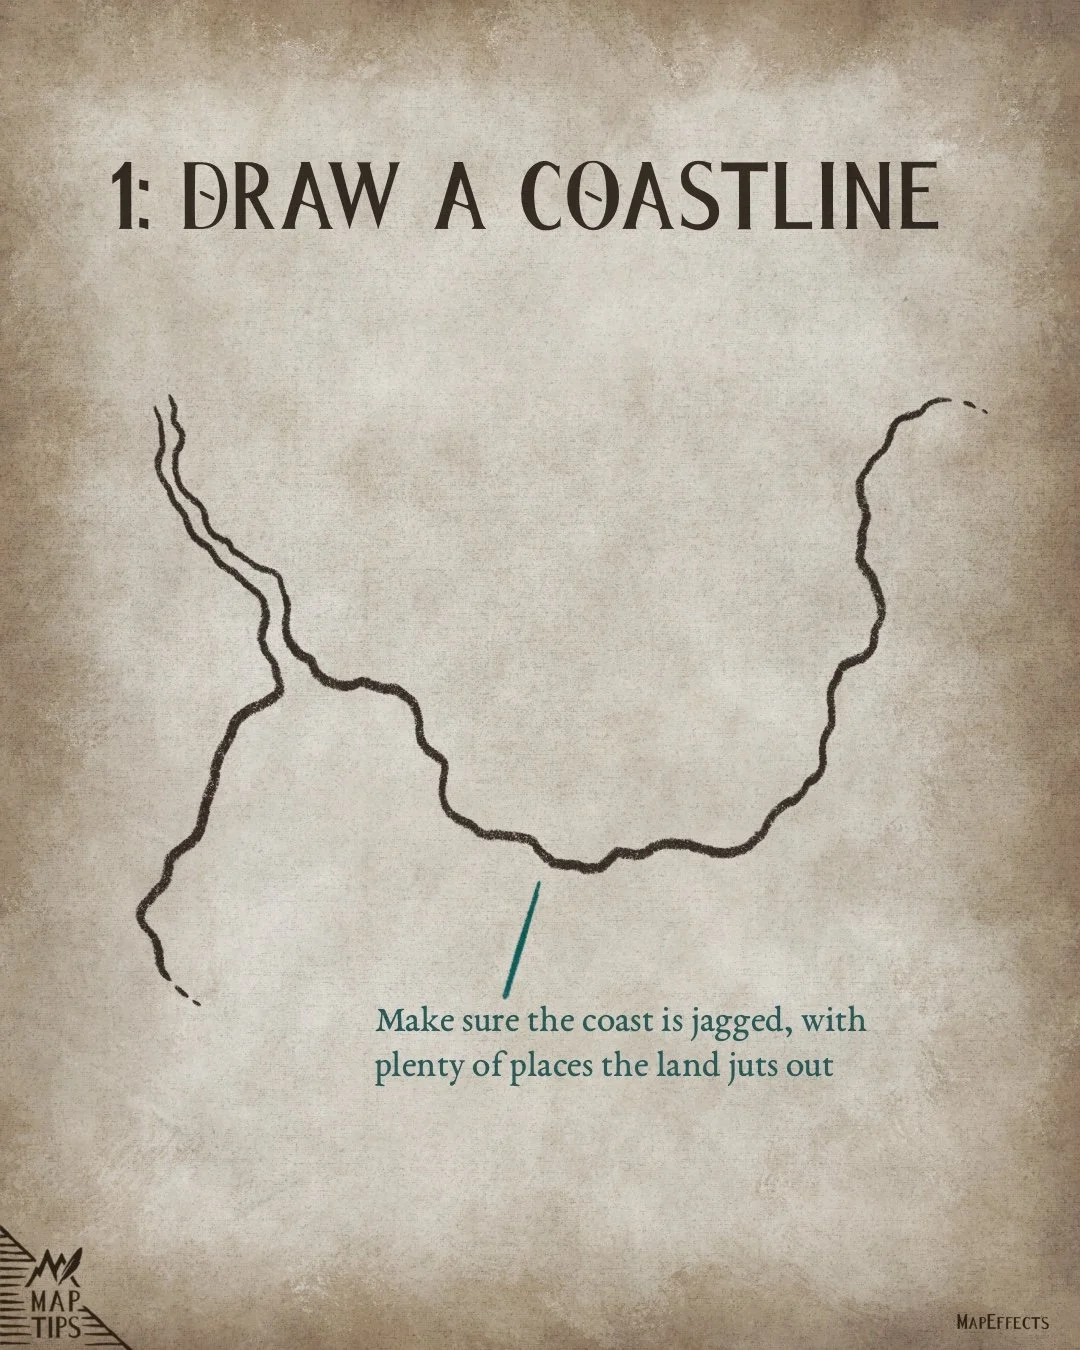
Draw a Coastline
Begin by drawing a basic coastline. Make sure the coast is jagged, with plenty of places where the land juts out. You can really push this as much as you want depending on how dramatic and rocky you want your coastline to look. Have fun and experiment!
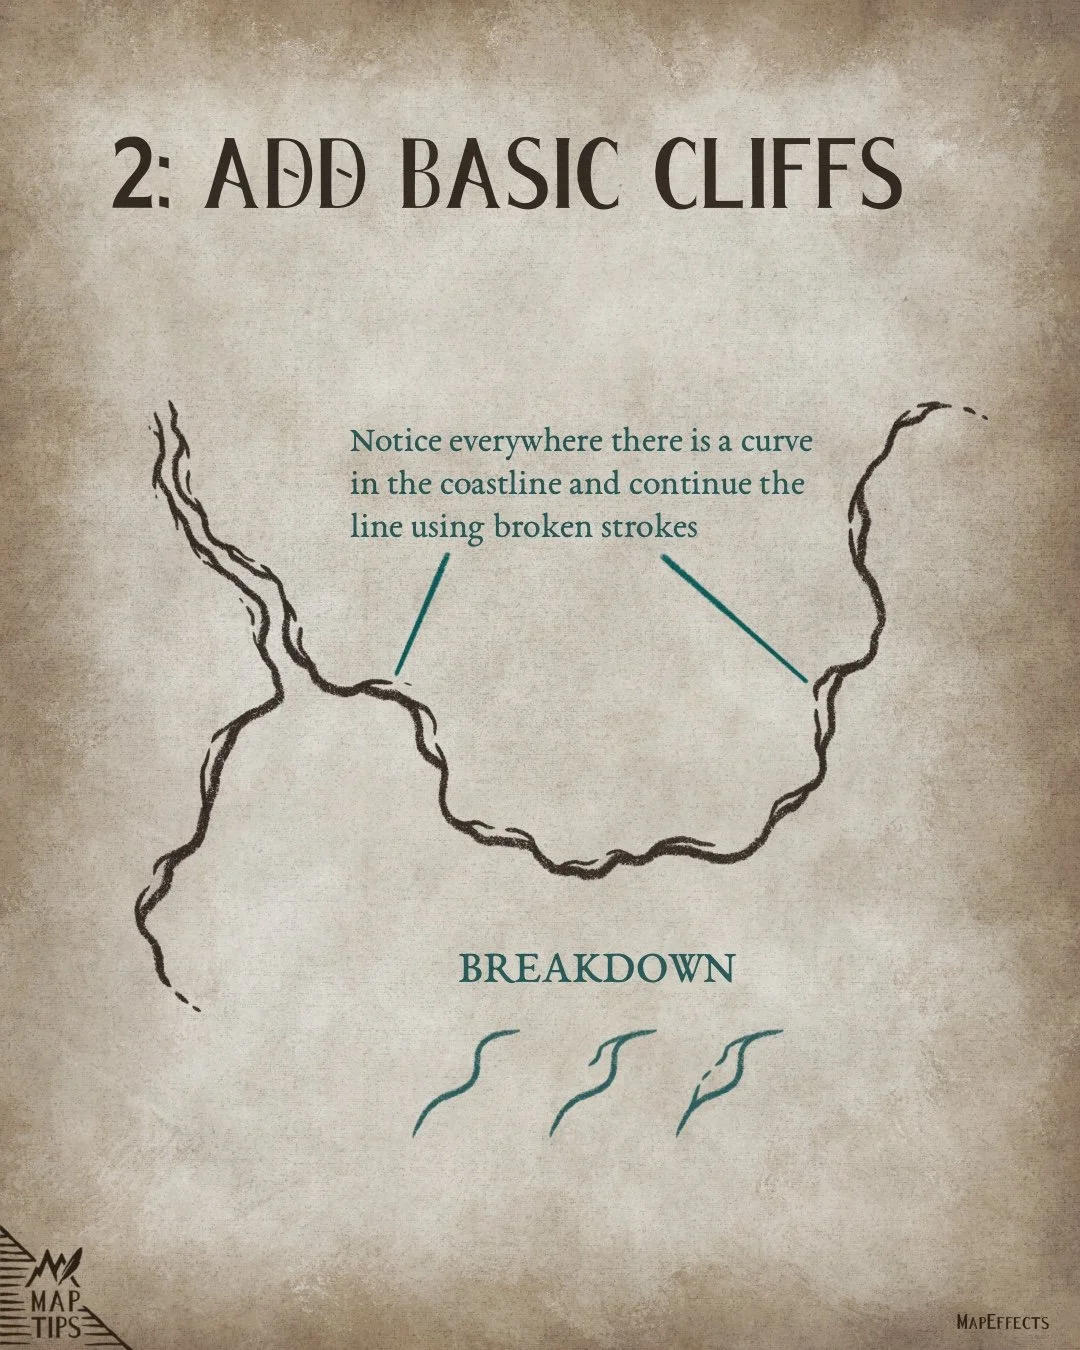
Add Basic Cliffs
Notice everywhere there is a curve in the coastline and continue the line using broken strokes. Look at the breakdown in the image to see a simplified example of how this works. You can see that just with a few simple lines you can add a surprising amount of depth.

Cartographer’s Liner Brush Field Kit
$29 | For Procreate, Photoshop, & Clip Studio Paint
Want the brushes I am using for this Map Tip? The Cartographer’s Liner Brush Field Kit contains 21x unique liner brushes designed to give an analog quality to your digital work.
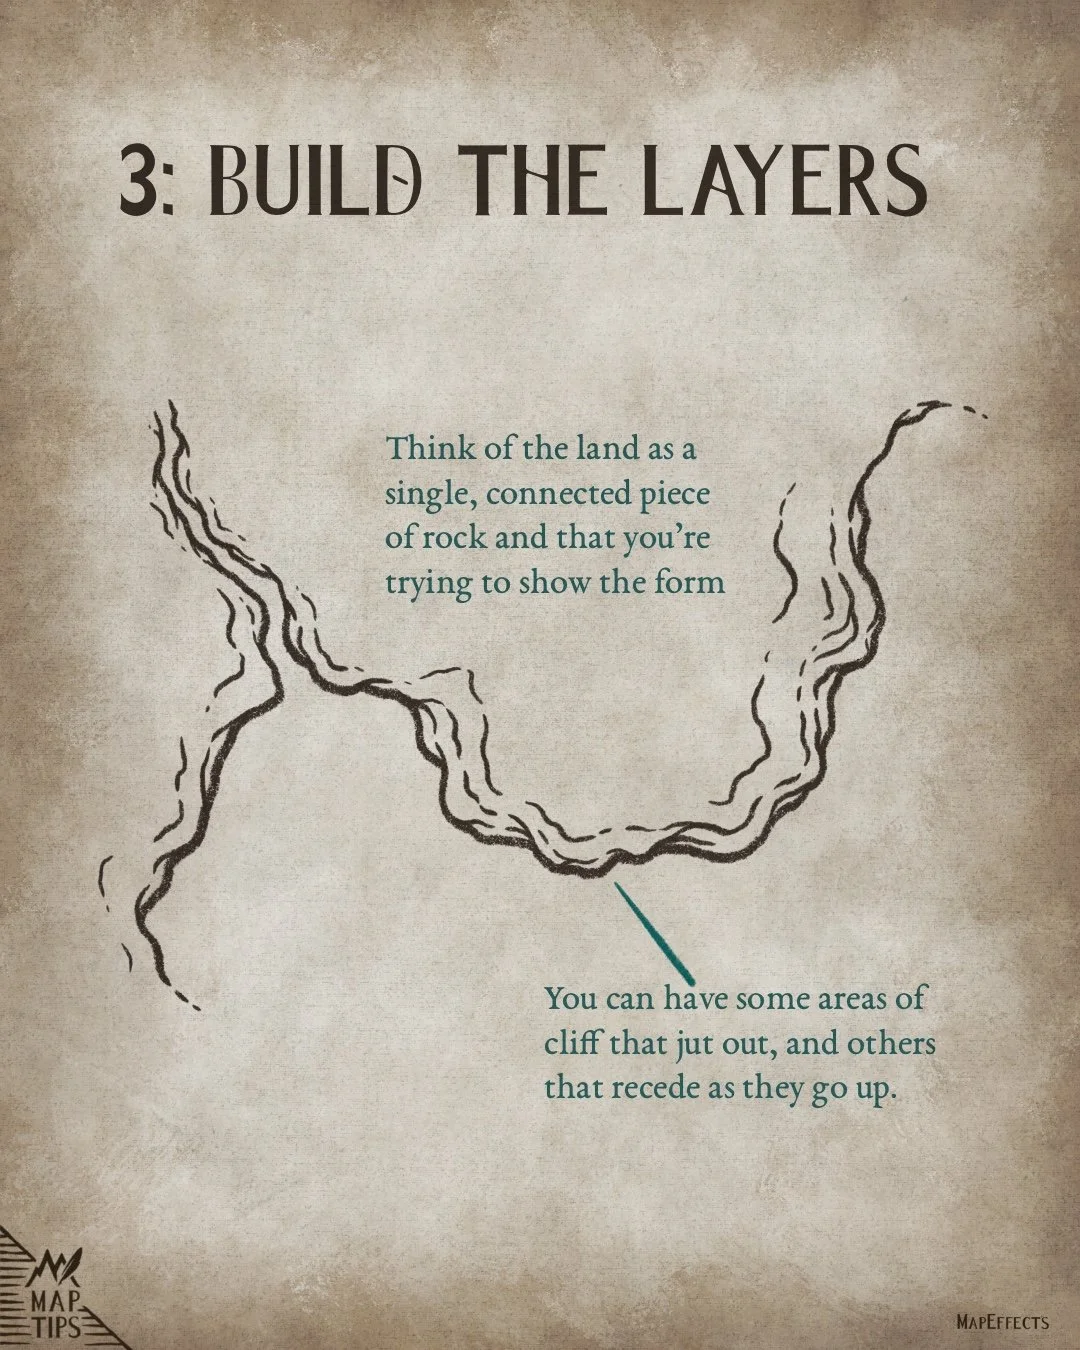
Build the Layers to Create Height
Think of the land as a single, connected piece of rock and that you’re trying to show the form. As you add layers you’ll naturally start to see where your lines will meet if you kept going.
Keep in mind that the greater spacing between lines indicates where the land flattens out a bit more, and tighter spacing gives the appearance of steeper terrain. In many ways it’s like drawing a topographic map with more organic lines.
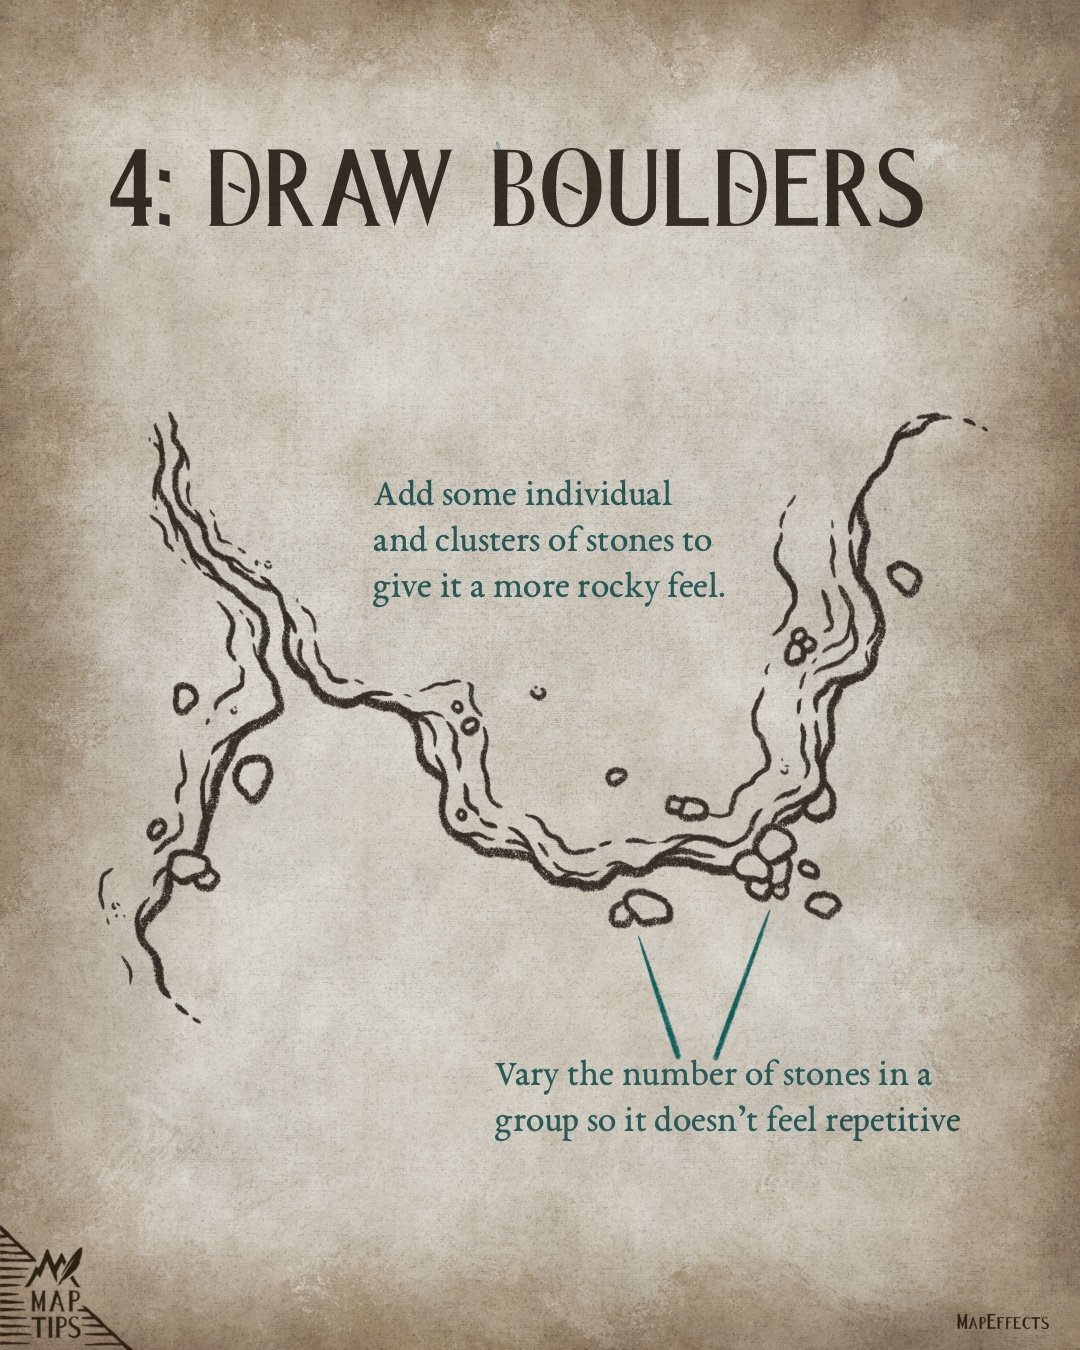
Draw Scattered Boulders
Add some individual and clusters of stones to give it a more rocky feel. You can also erase away part of your coastline and add in a few stones to add more interest. This is a great method to make everything feel connected.
Also, be sure to vary the number and size of stones in a group so it doesn’t feel repetitive. Do some individual rocks, others in groups of two, three, and so on. What may appear random to the viewer is actually very intentional.
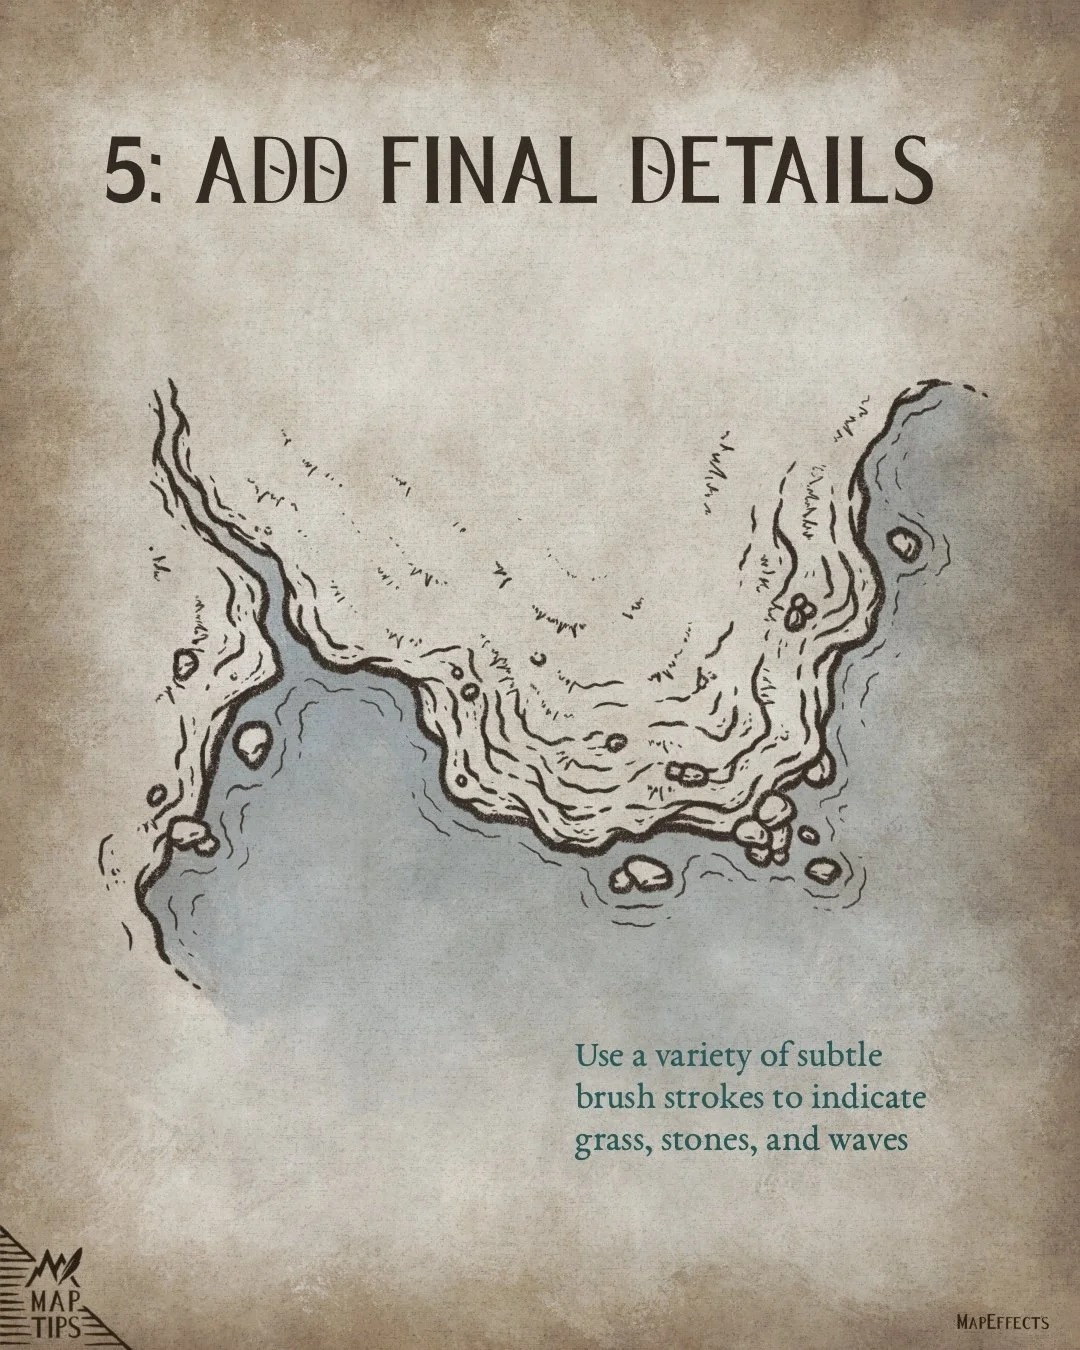
Add Final Details
It’s now time to add the final details to pull everything together. Use a variety of subtle strokes to indicate things like grass, stones, and waves.
You’ll notice that I’ve continued that layered pattern we talked about in step 3, but now I’m using grassy patches to give form to the land.
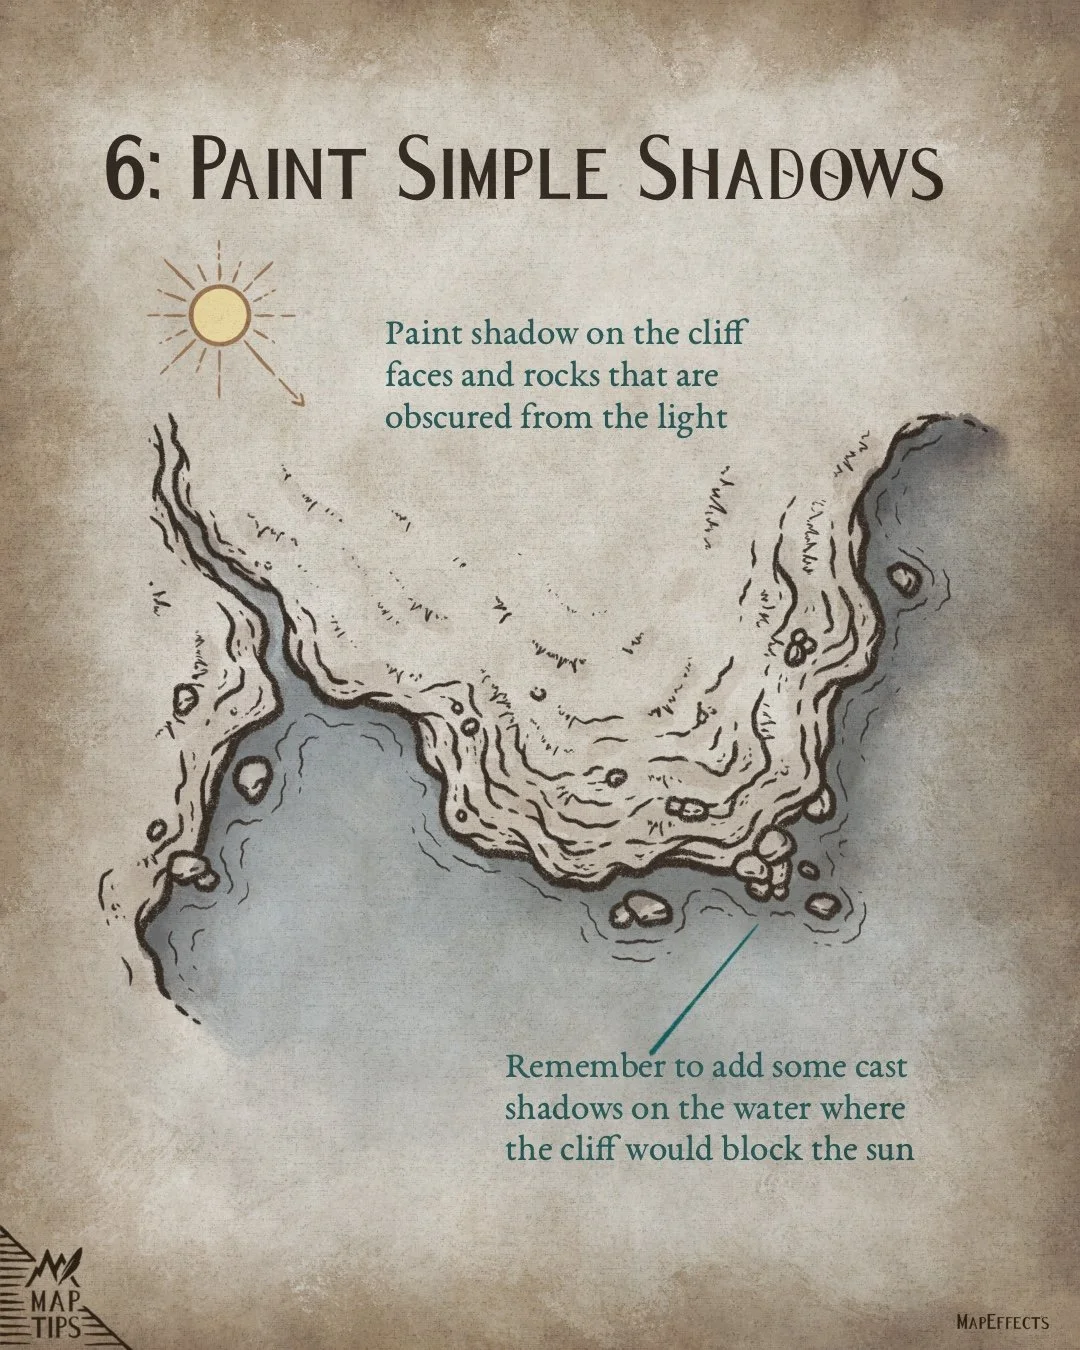
Paint Simple Shadows
Begin by painting some simple shadows on the cliff faces and rocks that are obscured from your light source. Remember to also add some cast shadows on the water where the cliff would block the sun.
If you’re working digitally like I am, create a new layer below your line are and set the blend mode to “Multiply”. With a semi-transparent brush you can then paint in the shadows with either a very desaturated brown or pure gray. In this case, I used more of a brown on the cliffs to match the sepia look, and a grey on the water to keep the shadows cooler in hue.
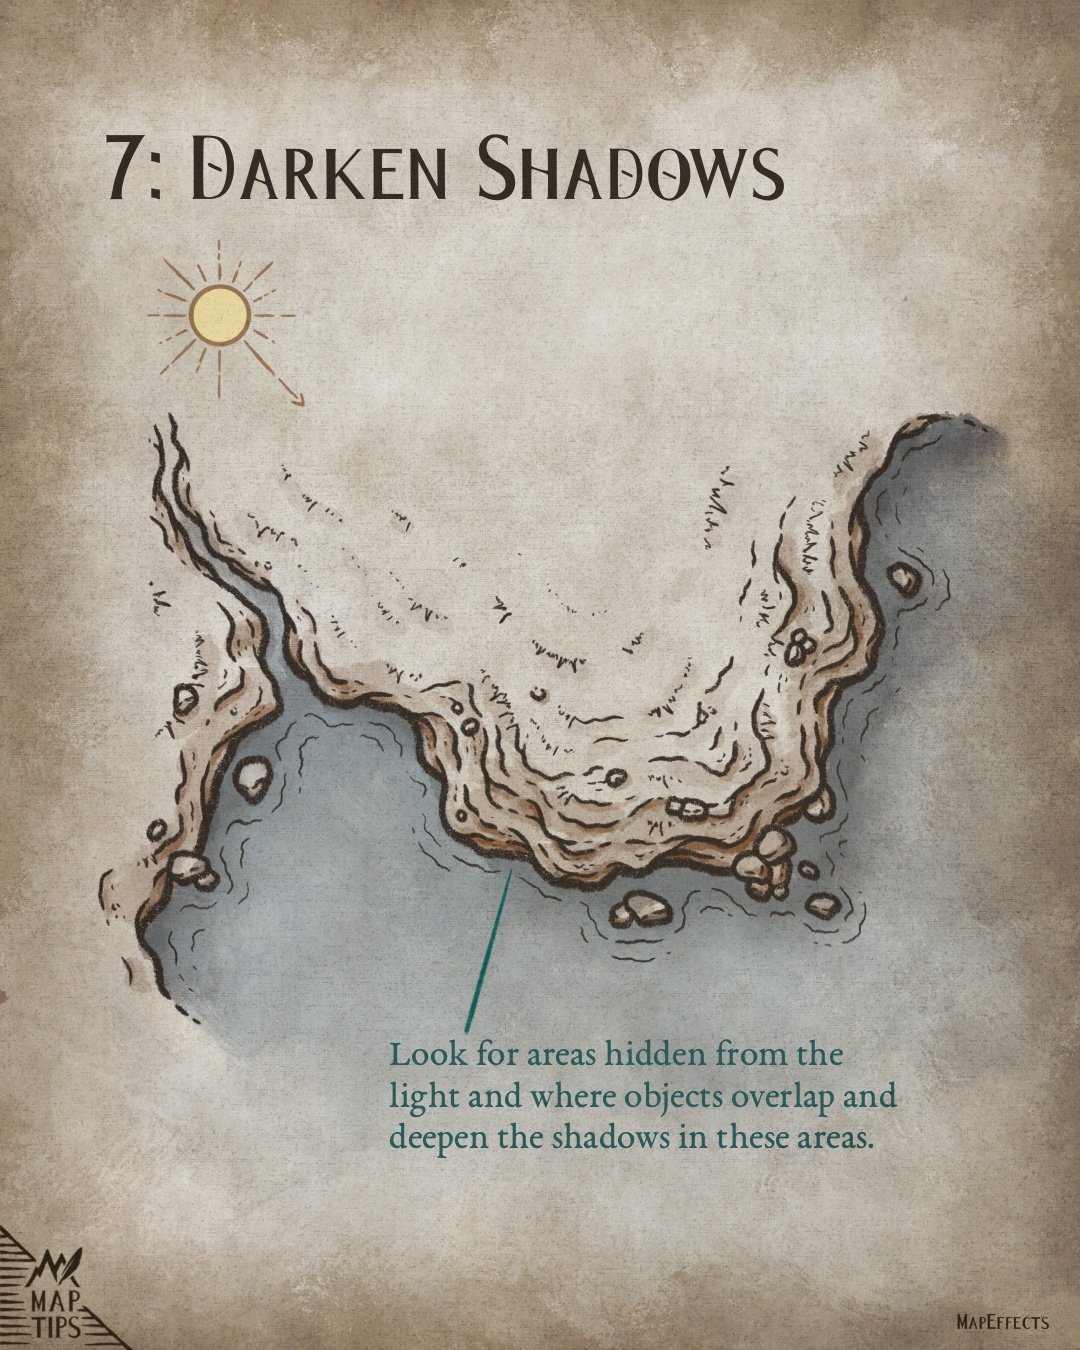
Darken Shadows
Using the same layers, brushes, and colors from the previous step, it’s now just a matter of making another pass and deepening the shadows in certain places. Look for overhangs, where objects overlap and darken the shadows in these places.
I hope you found this little Map Tip helpful in your journey to map your story. If you want to support Map Effects and help other map makers, be sure to share this with someone who will find it helpful and pin it to save for later!
Happy Mapping!
- Josh