
How to Draw a Jungle on Your Fantasy Maps

Ready to enter the dense canopy of a tropical jungle where the air is so thick you can feel it, and there is a new danger under every leaf? In this tutorial I will walk you through some steps so you can learn how to draw a dense jungle on your fantasy maps!
All the brushes used in this tutorial are available in The Cartographer’s Liner Brush Field Kit

1: Sketch the Shape
The first thing to do is start simple and just get a sense for the overall shape and placement of the jungle. Don’t skip this step or you may end up spending much more time revising.
All you want to do is focus on the overall shape, and lightly sketch where you want it to go on your map. You can also add a river snaking through the jungle to make things more interesting!
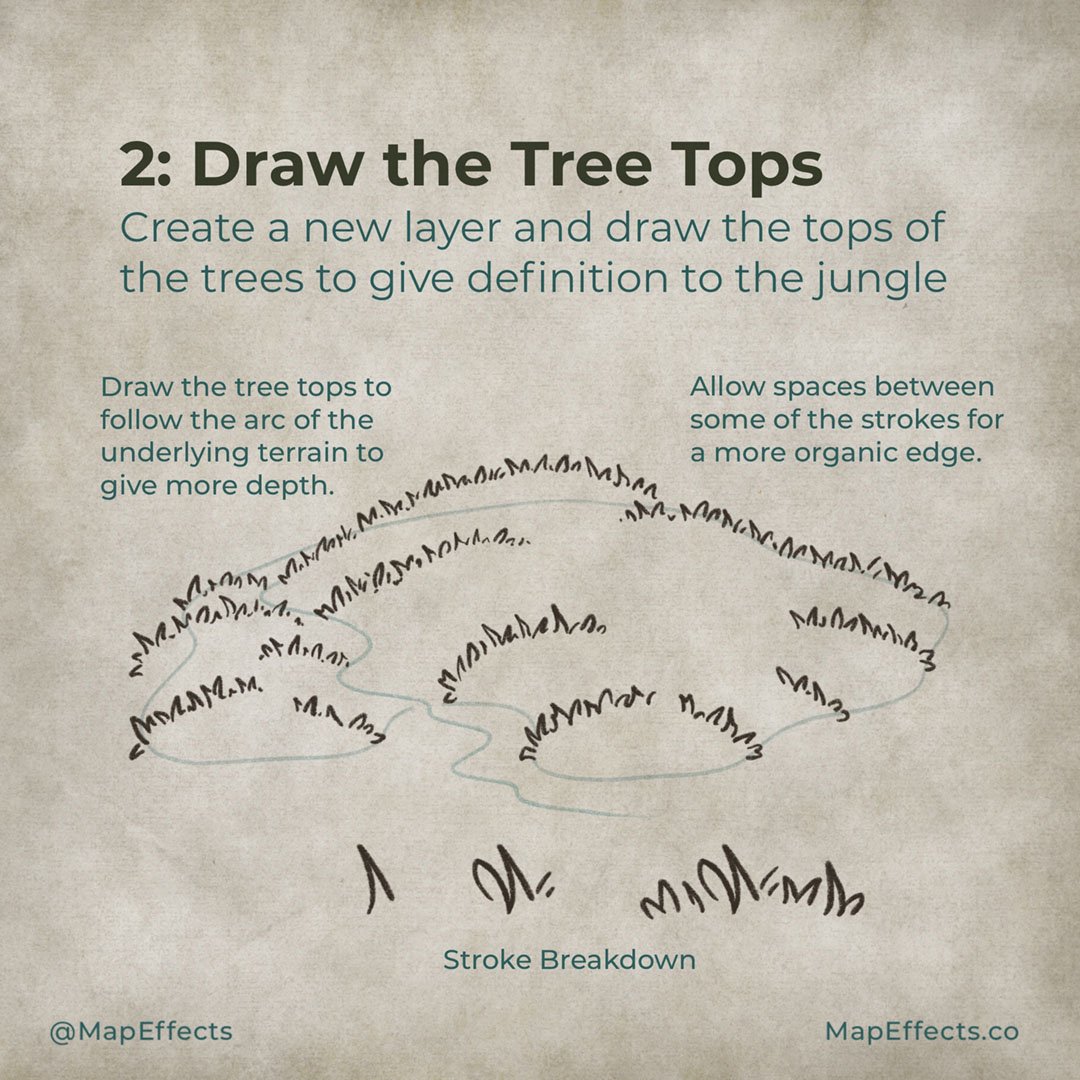
2: Draw the Tree Tops
Now you can begin drawing some tree tops using your original sketch as a guide. One of the characteristics of jungles is the diversity of plants so try to vary your stroke much more than you would for a pine forest. Mix more pointed strokes with dashes, or more rounded leaf shapes. You also want to make sure you allow breaks in your line art and that your strokes are going in different directions. This will help it have that “jungle” feel.
Keep the overall topography in mind and draw the tree tops to follow the arc of the terrain. This will give a lot more dimension.

3: Draw the Bottom Edge
You can now close off the rest of the jungle by drawing the bottom edge, but this time you want to invert your strokes so it looks like the leaves are pointing more downward.
More Tutorials You May Enjoy


4: Fill in the Detail
For the rest of the tree tops you will be using the same stroke pattern, just make sure you continue to follow the contour of the underlying hill. If you are having trouble with this, check out my Map Tip on how to draw forests on hills.
You can also add a few rock formations that emerge from the canopy, which will give a lot more interest. Don’t forget to throw some vertical lines to give the impression of tree trunks along the bottom edge of the jungle. Don’t worry about adding them all or making them perfect, you’re just implying what’s there.

5: Block in Color
You’re now ready to block in your main colors. The choice will depend on the palette of your map and the look you want.
Digital Bonus Tip
If you are using digital tools like I am, you can set your line art layer to “Alpha Lock” and paint over your lines to change their color to fit the color palette of your map. This is a handy trick I use all the time.

6: Add Simple Shadows
First, select the direction of your light source and where it will be hitting your jungle. You can then broadly paint in some simple shadows to begin giving it some dimension. Don’t get lost in detail at this point, focus on the big things and not individual tree tops.
The brush I will be using to do all the shading in this tutorial is The Wet Canvas Brush included in The Cartographer’s Liner Brush Field Kit. The reason I love this brush is that I can build up the shadows gradually like you would with traditional watercolors, and it has a nice edge for a more painterly look.
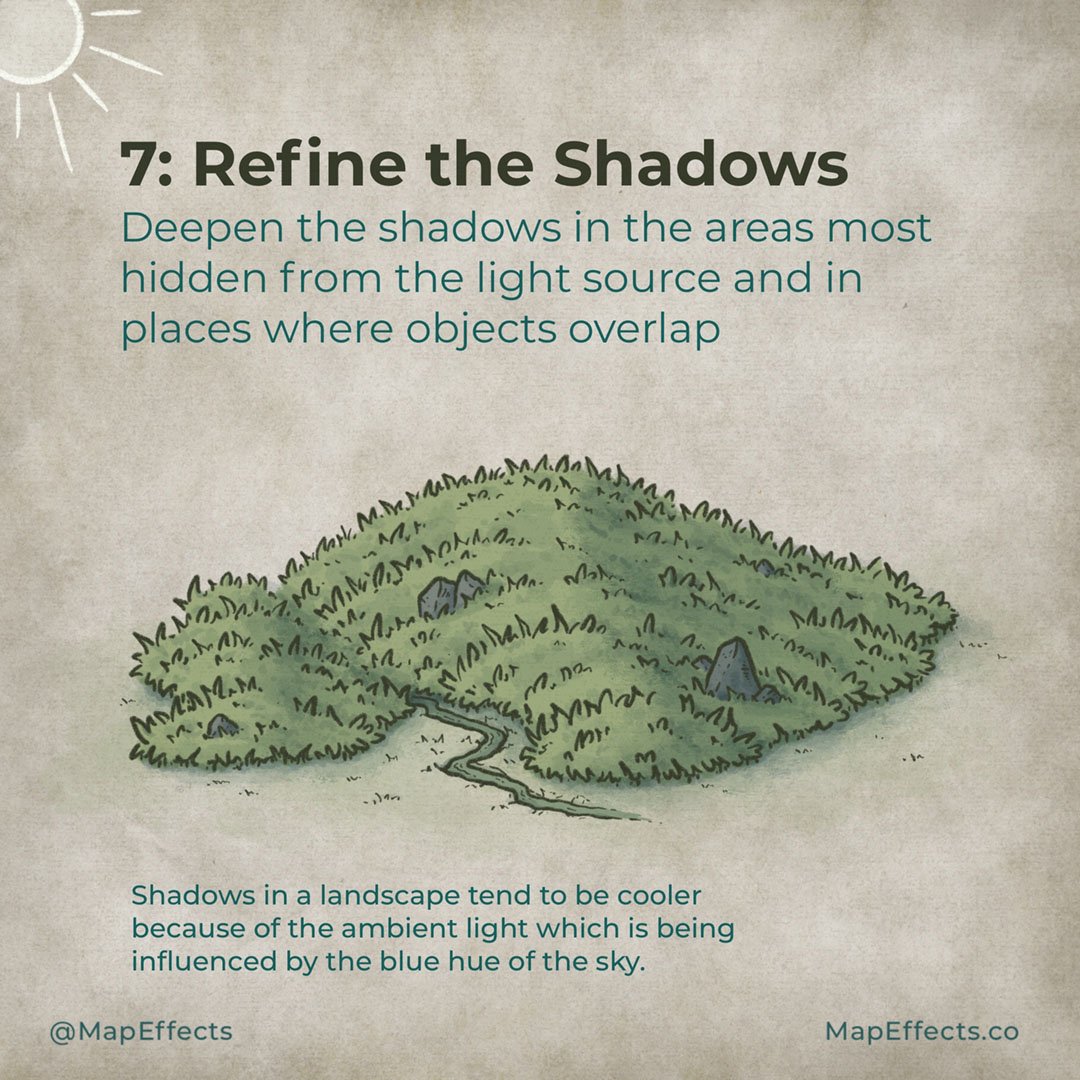
7: Refine the Shadows
Now that your jungle has some dimension, take another pass and deepen some of those shadows near the “peak” of the jungle, along the bottom edge, and anything objects overlap.
For the shading I am using a desaturated teal color with the blend mode of my layer set to Multiply. This will darken the underlying colors while also laying in a bit of the blue.
Shadows in a landscape tend to be cooler because of the ambient light which is being influenced by the blue hue of the sky. This is a way to introduce a little color contrast to your map.

8: Add the Highlights
Last but not least, it’s time to make your jungle come alive with some light! You will do the same this as you did in the previous steps for the shading, but this time you will be brightening the areas of the jungle being hit by your light source.
If you are working digitally you can select a warmer color and set your blend mode for the layer to “Add” or “Multiply”. Just experiment because you will get different looks depending on the app you’re using.
You’re done! If you found this tutorial helpful be sure to follow MapEffects on Instagram and tag me with the map you create and I may feature your work. Thank you, and I look forward to seeing your map!
Josh
